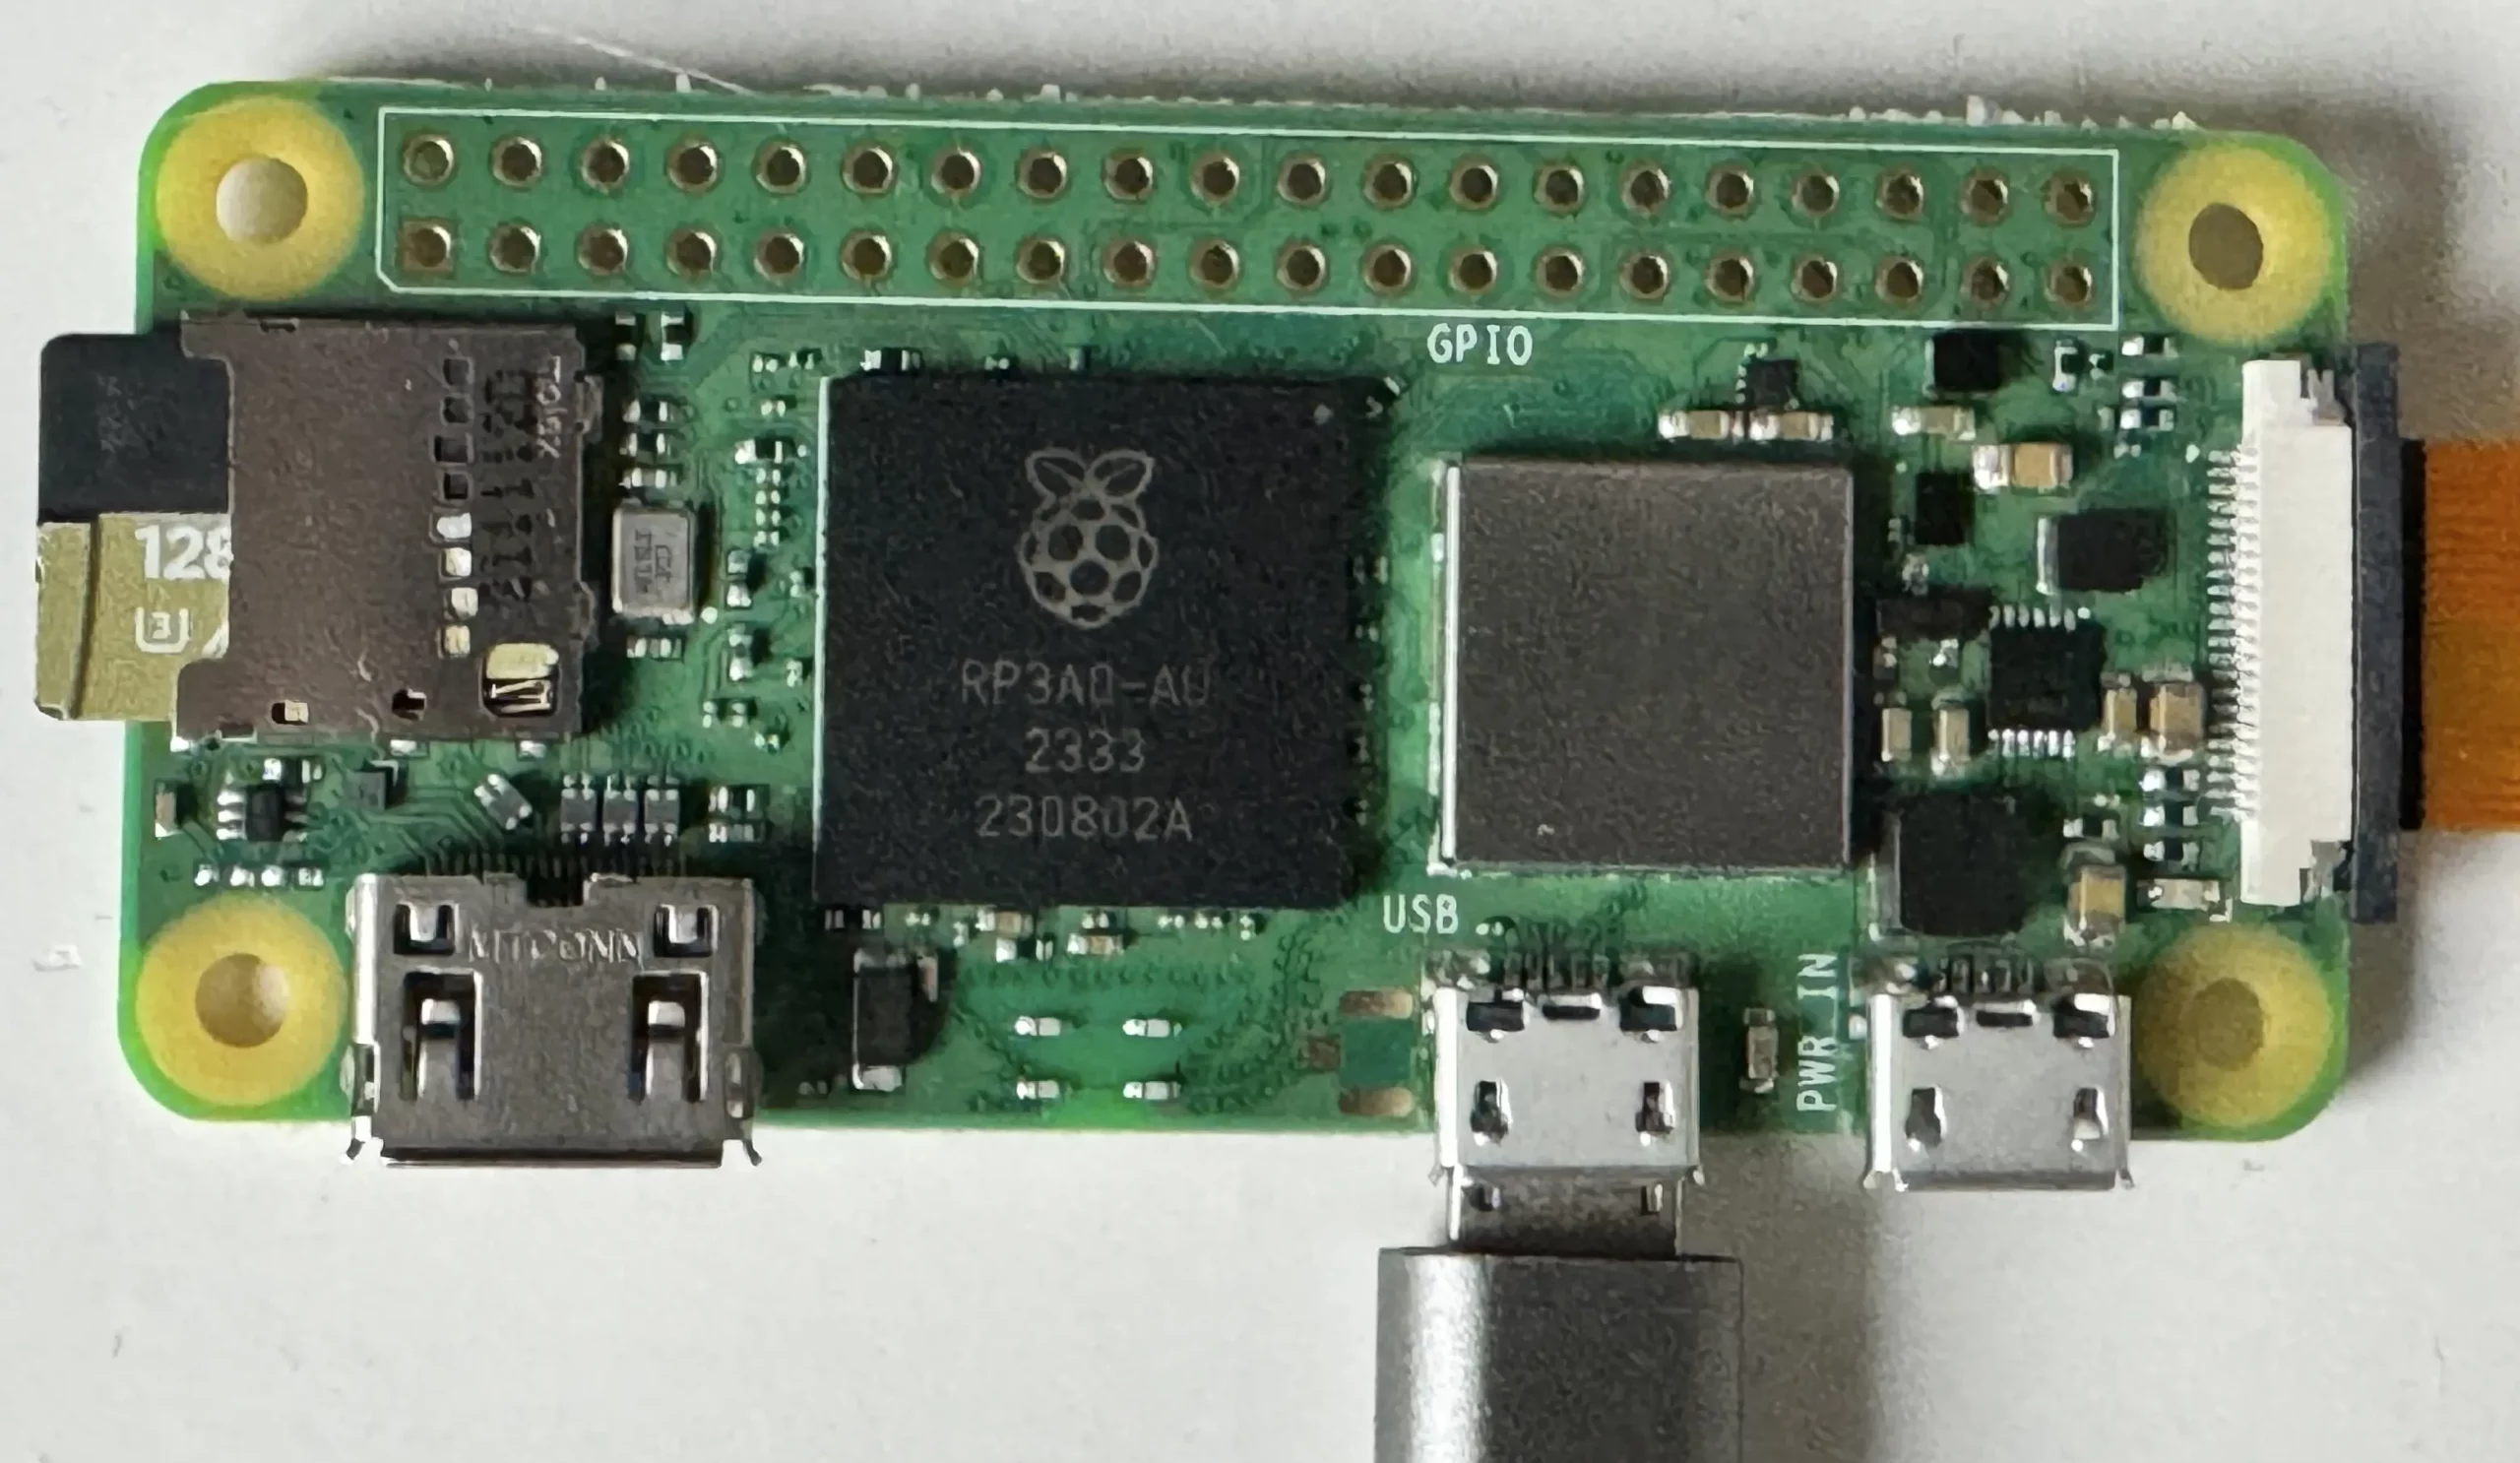
How To Set Up Raspberry Pi Zero 2 W - Headless Mode
Introduction
This guide is aimed at helping you set up the Raspberry Pi Zero 2 W in "headless mode". Headless mode connects to the Raspberry Pi command line or desktop environment without attaching a screen, keyboard, or mouse. Connect the Raspberry Pi to your main machine via WiFi or USB OTG, and you can use SSH to dial in. The guide has specific sections for Windows, Mac, and Linux.
If you would like to purchase a Raspberry Pi Zero 2 W or the Arducam IMX519, here are some affiliate links:
Raspberry Pi Zero 2 W on amazon.co.uk
Flashing the Raspberry Pi Zero 2 W Firmware
Have an SD card ready and plug it into your machine's SD card reader.
Note: Flashing works best with the internal SD Card reader because the card will have multiple partitions.
Download and install the Raspberry Pi Imager. You can get the utility from the downloads page:
https://www.raspberrypi.com/software/
If you are on linux:
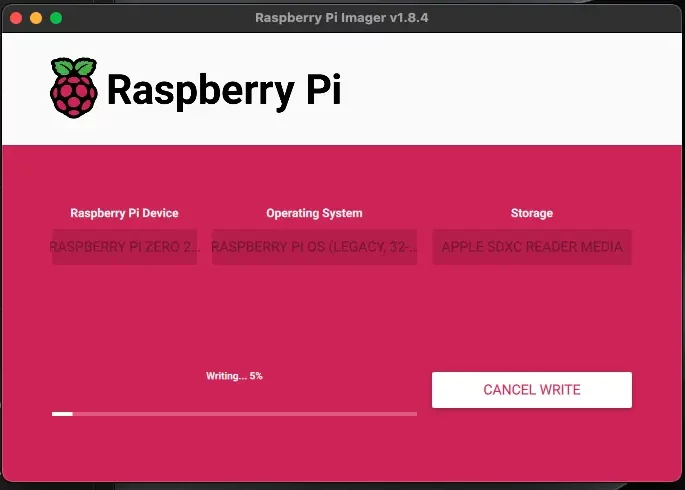
sudo apt install rpi-imagerGo ahead and select Raspberry Pi Zero 2 W from the Device Section.
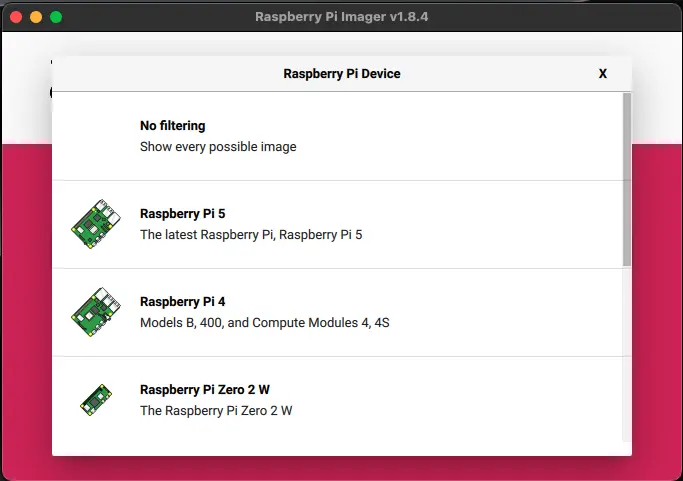
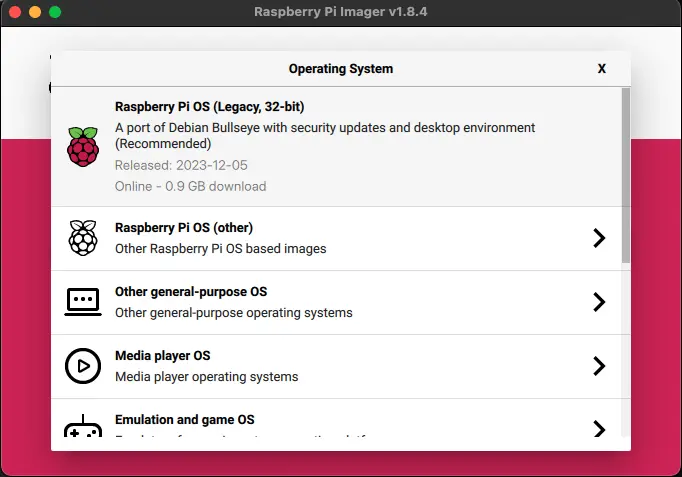
Select the Raspberry Pi Os (Legacy, 32-bit), a Debian Bullseye port. Select the SD card you inserted and click next.
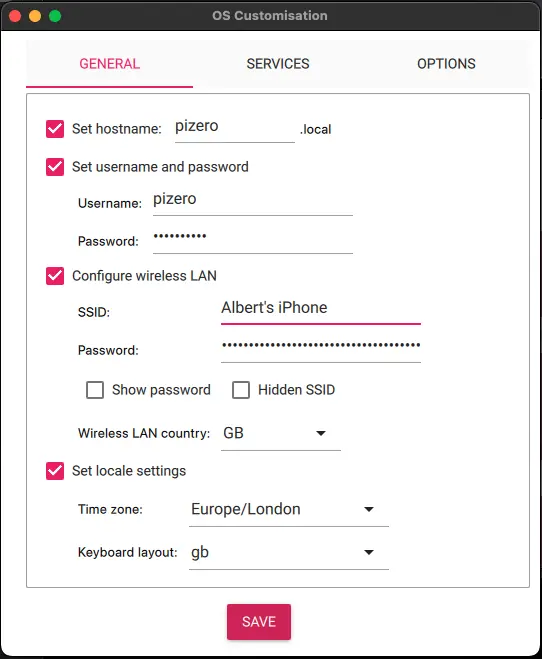
EDIT SETTINGS to apply OS customisation settings.

It would be best if you considered giving each hostname a unique name.
Set up your username and password.
Include your Wifi SSID (name) and password.
You can go ahead and write the configuration to the card.
Headless USB Setup
You can access the. Raspberry Pi Zero 2 W headless (without a screen, keyboard and mouse) by setting up USB OTG (On The Go).
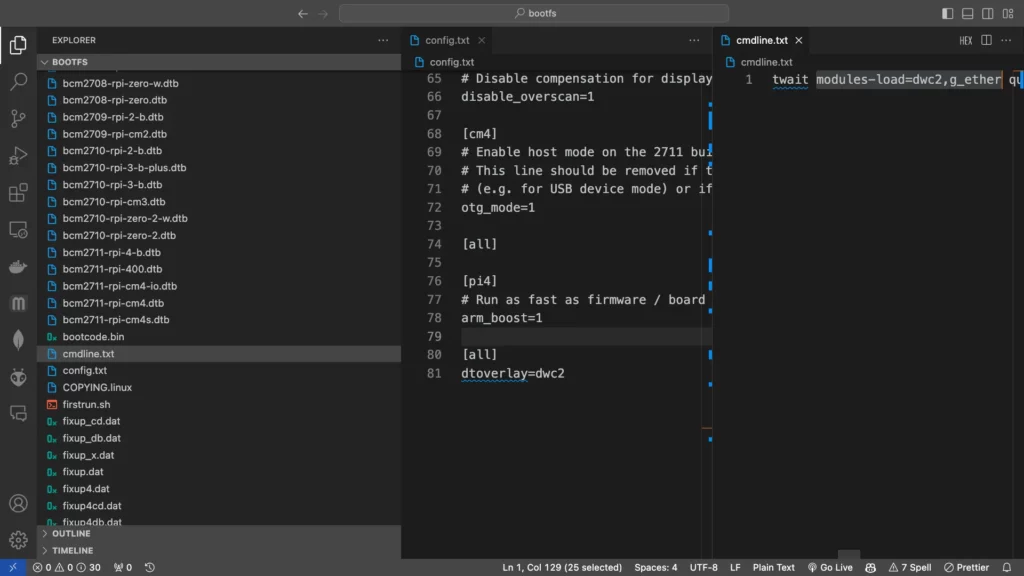
You need to edit some files on the SD card, using a code editor like Visual Studio Code or Notepad++.
You can download Visual Studio Code from here:
If you would like a privacy-focused version of Visual Studio Code, you can try VSCodium from here:
Or if you want to try Notepad++:
To enable headless USB OTG we need to load the dwc2 driver. According to the good people on the Raspberry Pi Forums, dwc2 is an upstream driver which can do the OTG host/gadget flip dictated by OTG_SENSE.
You can just browse the bootfs partition with your favourite editor.
Search for rootwait in cmdline.txt. Add one space after rootwait and paste in the following:
modules-load=dwc2,g_etherOpen config.txt and type the following under the [all] section:
dtoverlay=dwc2Create a blank file and name it ssh, with no extension. This will enable ssh on the pi zero.
Make sure you save all files. If in doubt, check out the screenshot below.
You can now unplug the card from your machine and plug it into the Raspberry Pi.
Connecting to the Raspberry Pi Zero 2 W With SSH
This section will show you how to establish a secure shell (SSH) between your machine and your Raspberry Pi Zero 2 W. You can use your terminal to install, update, and configure the libraries.
Windows
There are a few prerequisites which are required to connect to your Raspberry Pi through a Windows machine:
- Bonjour
- Putty
Note: Connecting the Raspberry Pi 2 Zero W to Windows 10 through USB OTG can make the USB not recognised by the driver as USB Ethernet/Gadget. If this is the case, I wrote a post with the fix, which you can find here:
https://albert-fit.com/how-to-fix-windows-10-raspberrypi-usb-otg-ethernet-gadget/
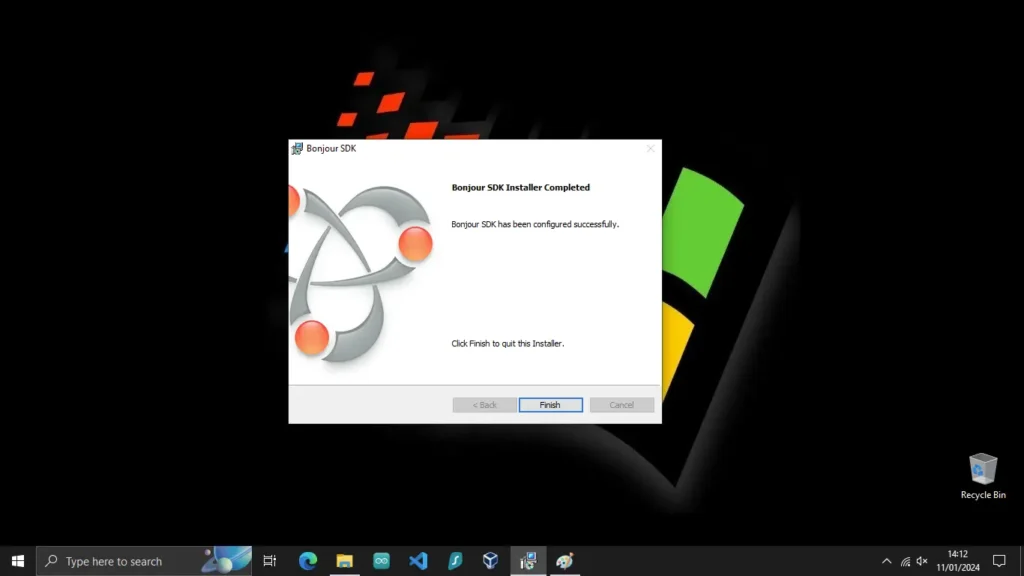
Bonjour
Strangely, you need Bonjour to get Raspberry Pi to talk to Windows over a local network.
According to Free Code Camp, Bonjour is Apple's implementation of zero-configuration networking (zeroconf). It allows devices running Windows and Apple operating systems (like macOS and iOS) to connect and share resources without configuration settings.
Bonjour allows you to locate other devices, such as scanners and printers, on a local network and connect with them. It also will enable you to share files irrespective of your operating system, whether it's Windows, macOS, or Linux.
Bonjour will be installed on a Windows machine when setting up iTunes. You can also download and install the Bonjour SDK from:
https://developer.apple.com/bonjour/
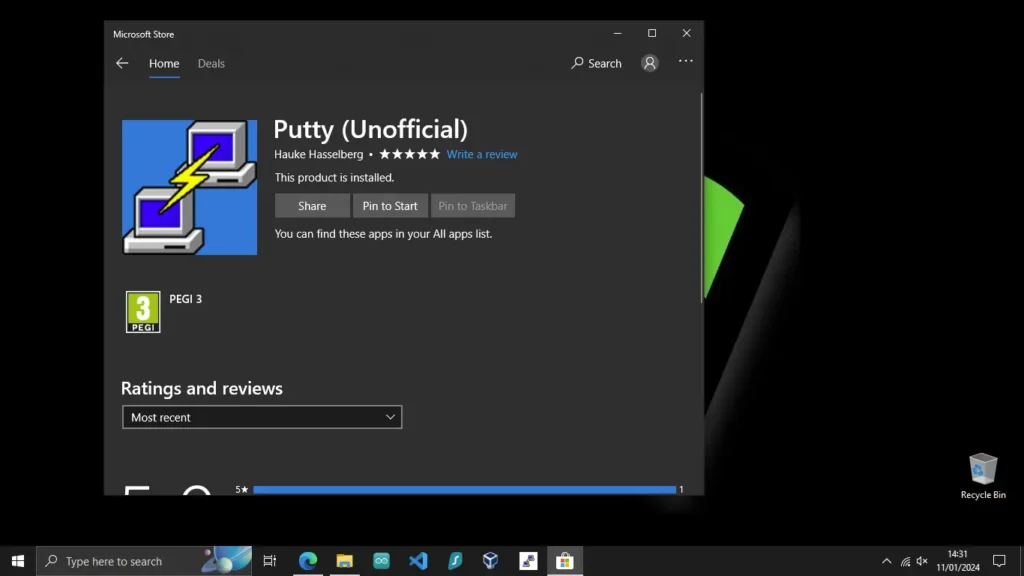
Putty
According to SSH.com, PuTTY is a versatile terminal program for Windows. It is the world's most popular free SSH client. Putth supports SSH, telnet, and raw socket connections with good terminal emulation. Putty also supports public key authentication and Kerberos single sign-on. It also includes command-line SFTP and SCP implementations.
You can download Putty from:
The official page:
https://www.chiark.greenend.org.uk/~sgtatham/putty/latest.html
or the Microsoft Store:
Once you have installed putty, you can ssh into your Raspberry Pi by typing your hostname in the following format:
[user]@[hostname].local
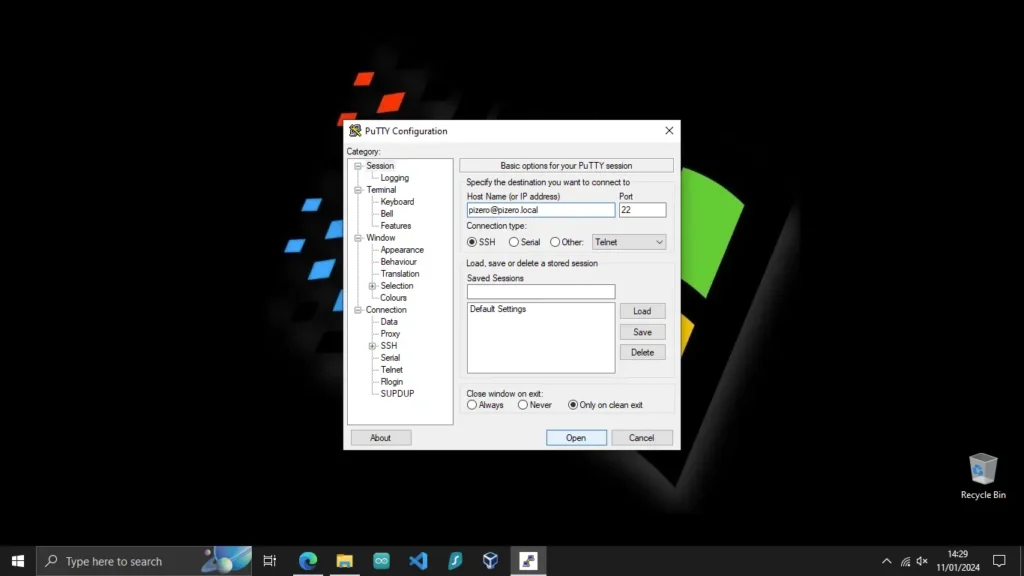
You will then be prompted for your password, which you set up in the Pi Imager under username and password OS configuration.
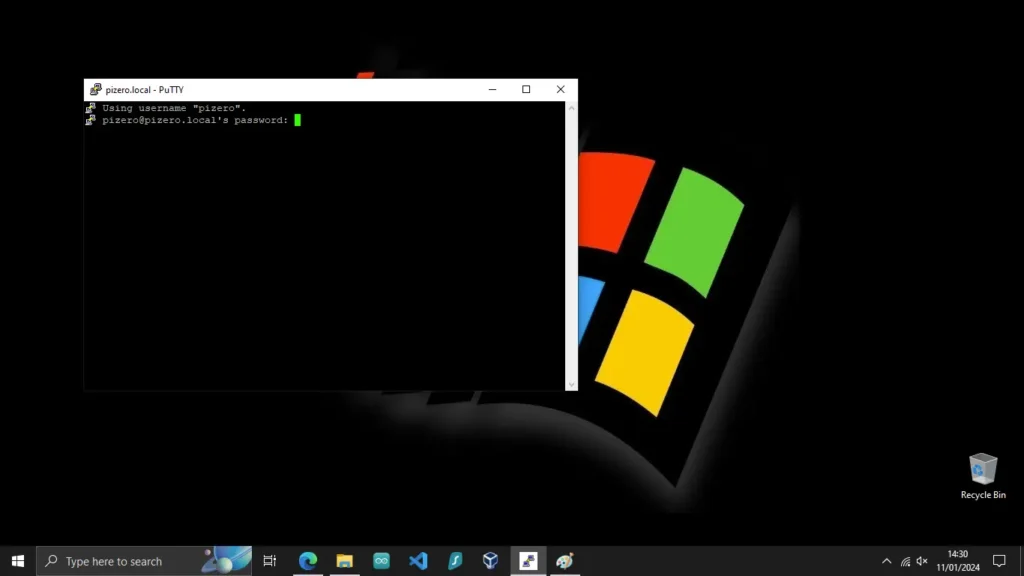
Upon a successful connection, the putty window text displayed gives you the [username]@[hostname]:~$ line

Mac
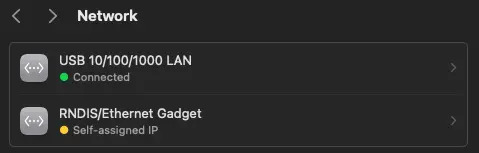
No additional software is required to connect the Raspberry Pi Zero 2 W to a Mac machine. You can verify if your USB OTG setup is working by navigating to Network in Settings, where you will be able to see the RNDIS/Ethernet Gadget.
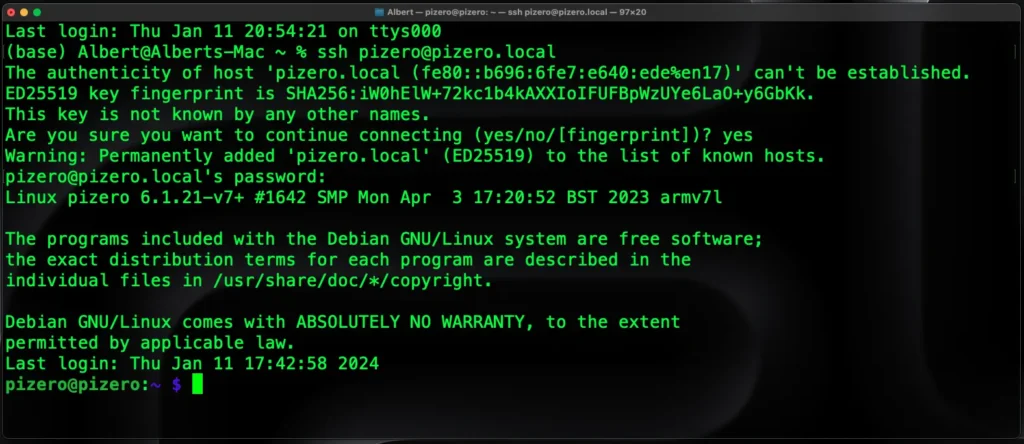
Once connected, you can open a terminal window (cmd + space to open Spotlight and type terminal). In the terminal, type ssh [username]@[hostname]. Just so you know, the authenticity of the host won't be established (because we have just created it). You can type yes to continue, and you will be prompted to insert the password, which you set up in the Pi Imager under username and password OS configuration.
When successfully connected, you will be greeted by [username]@hostname:~ $
Linux (Debian based)
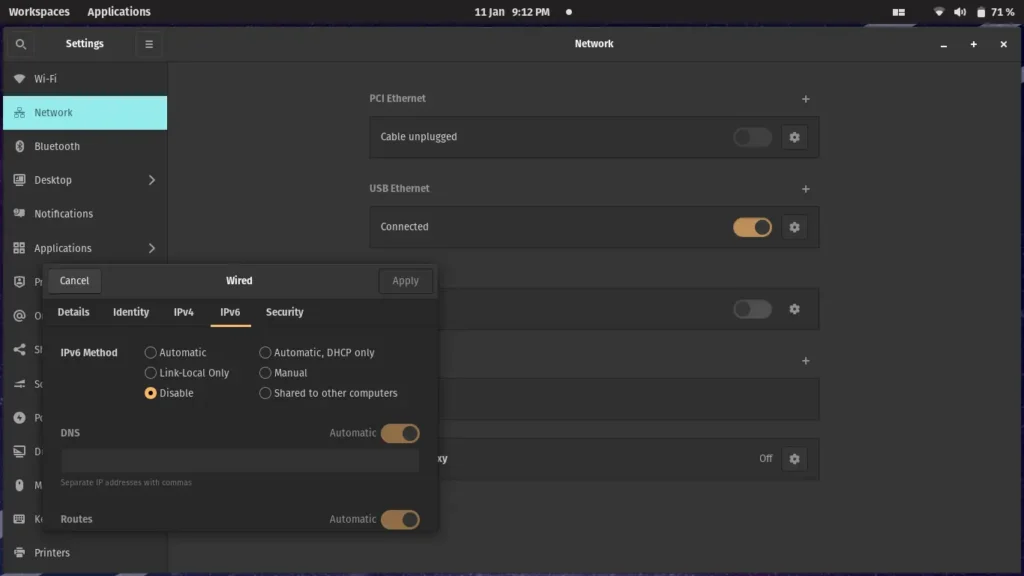
I currently run a Pop Os! machine, and I know the following settings to work for USB OTG on any Debian based distribution:
- Plug the Raspberry Pi into your Linux machine
- Go to Network -> USB Ethernet
- Set the IPv4 to Link-Local Only
- Set the IPv6 to Disable

You can now ssh the same way as you do with mac:
- Open a terminal window
- type ssh [username]@[hostname].local (for example ssh pizero@pizero.local)
- agree to adding the host to known hosts, and
- Input your password.
Updating Raspbian
First, let's update the system. Connect to the Raspberry Pi with ssh and type the following in the terminal window:
sudo apt update
sudo apt full-upgrade
sudo reboot
The Sudo is a command-line utility for Unix-based systems. The utility provides an efficient way to temporarily grant users or user groups privileged access to system resources to run commands they cannot run under their regular accounts.
The apt command is a powerful package management utility used primarily in Debian-based distributions, including Ubuntu. It performs package management tasks, such as installing, removing, and upgrading software packages.
In Linux-based operating systems, mainly Ubuntu, the command essentially instructs to update the local package index. It downloads package details from all set sources to refresh the package cache. The package manager (in this case, ‘apt’) must know which packages are available and where to find them to install software or packages on your system. You can read more about it on linuxsimplify.com.
According to Kris Koishigawa, the "full upgrade" command downloads and installs the updates for each outdated package and dependency on your system.
The "autoremove" command will search for any packages and dependencies that are no longer required and remove them.
sudo apt autoremove
sudo apt clean
The "clean" command will clean up the cache.
Installing RealVNC
RealVNC is one of the many ways you can gain remote access to your Raspberry Pi Zero 2 W. Install RealVNC on your Raspberry Pi by typing the following in the ssh terminal:
sudo apt install realvnc-vnc-server realvnc-vnc-viewerYou now need to enable the VNC server on the Raspberry Pi:
sudo raspi-configHitting enter will Open the Raspberry Pi Software Configuration Tool.
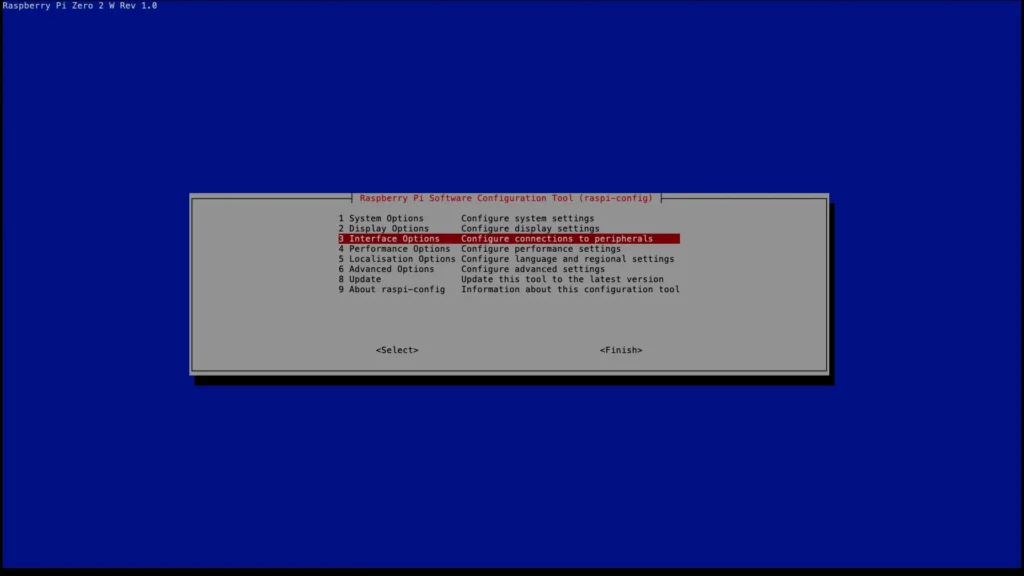
Navigate to the Interface Options.
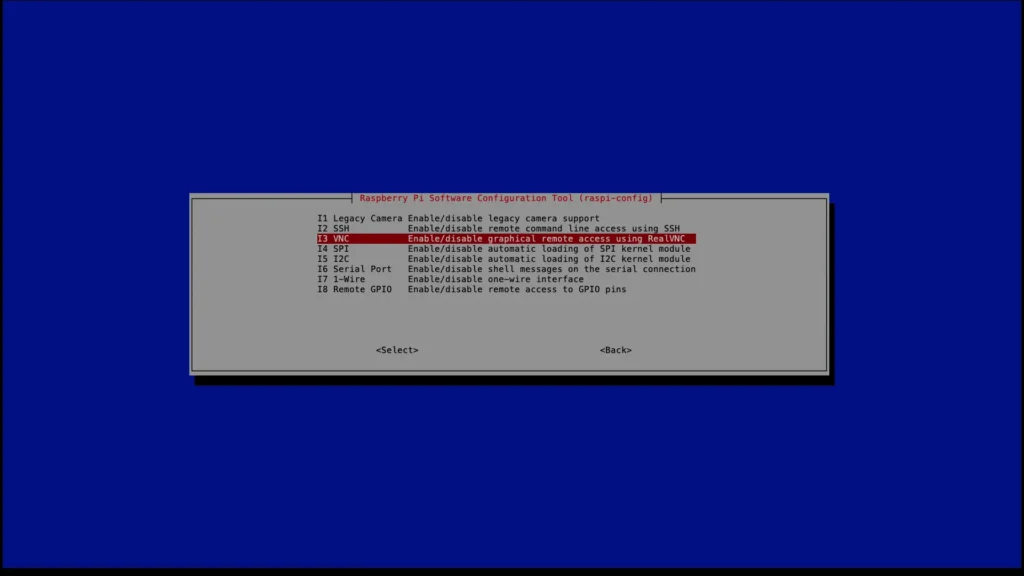
Select VNC and hit Enter.
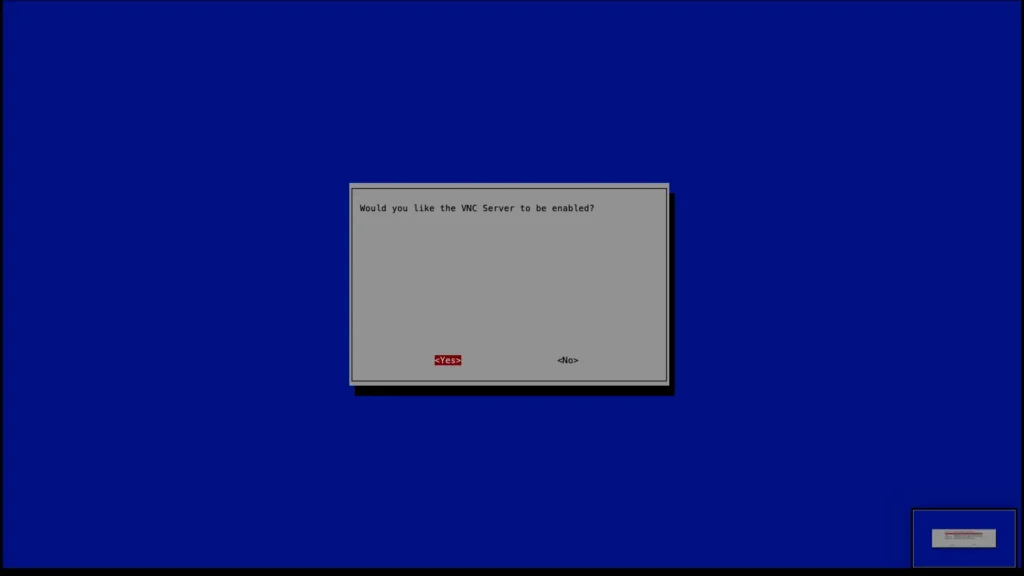
Hit enter again to enable the VNC.
Now, you can exit this menu by hitting Esc, Esc.
RealVNC Client
Download the client from the following link:
https://www.realvnc.com/en/connect/download/combined/
You do not have to sign up to download and use the client on your local network.
Click on "Use only for direct or offline connectivity".
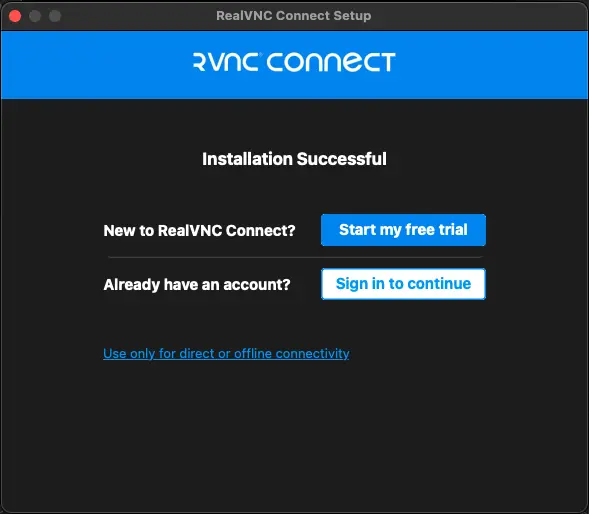
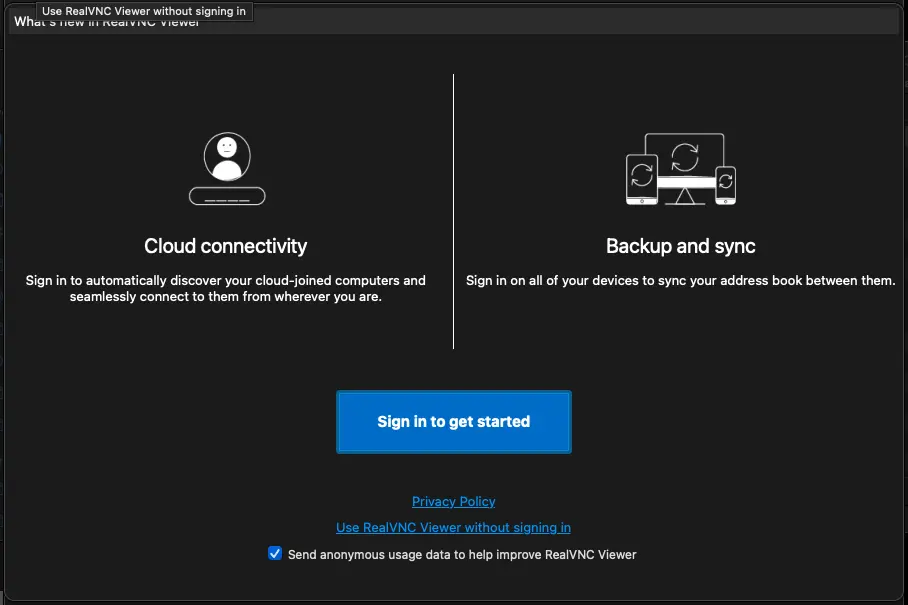
You can make an account if you'd like to. If you do not wish to create an account, click "Use RealVNC Viewer without signing in".
Type the following command to get the IP of the Raspberry Pi from the window where you have the SSH connection open:
hostname -I
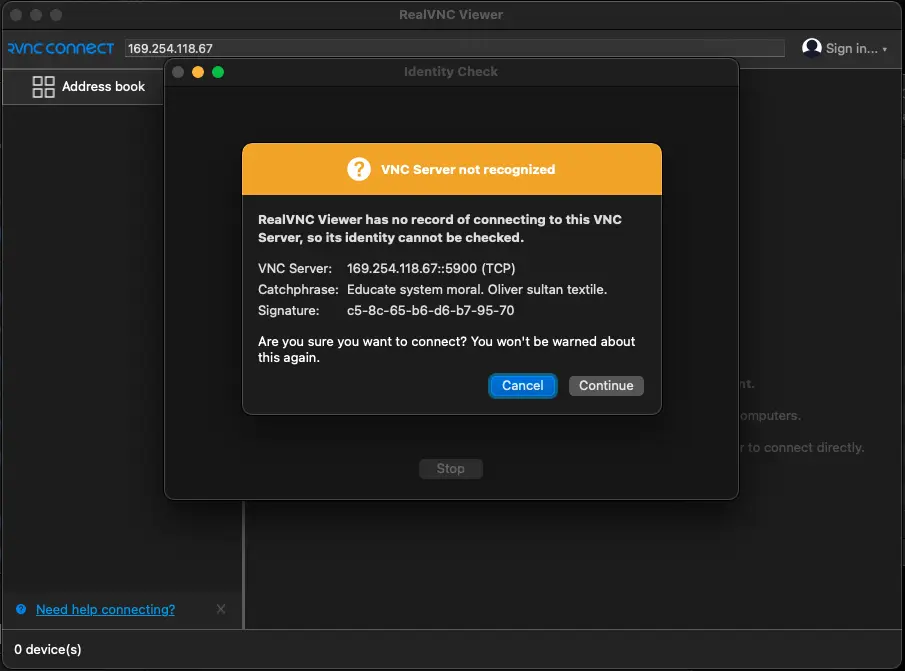
Copy the IP shown first with Ctrl+Shift+C and paste it in the "Enter a VNC Server address or search" bar.
You will get the server identity check error, and you can continue. (You have just set up this server, so there is no identity to check).
Alternatively, you can connect with your hostname. local (in my example pizero.local).
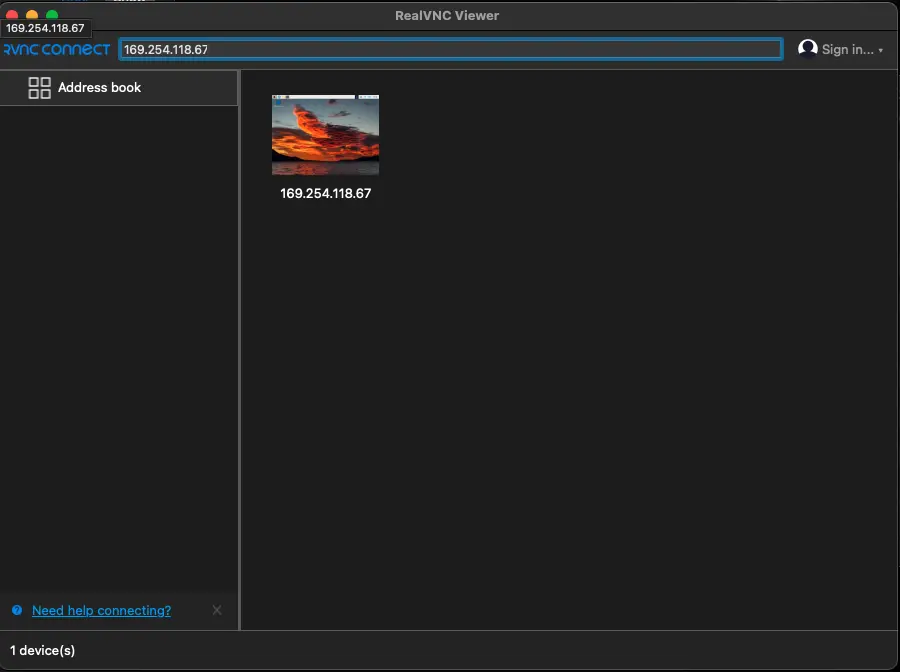
Once you connect, the connection will be saved under your connections.
Now you should see the Raspbian Desktop in a window on your machine!

Conclusion
Congratulations on your Raspberry Pi Zero 2 W setup!
This tutorial details how to:
- Set up the SD card;
- Connect the Raspberry Pi with USB OTG
- Enable SSH
- Connect to the Command Line with SSH; and
- Install RealVNC to connect to the Raspbian Desktop.