How To Fix Windows 10 RaspberryPi USB OTG Ethernet/Gadget
Introduction
In this comprehensive guide, we'll tackle the common USB OTG connection issues when using the Raspberry Pi Zero 2 with Windows 10.
The problem is that when you connect the Raspberry Pi Zero 2 W, it first gets identified as a USB Serial Device on a COM port.
Thankfully, we can overcome this by installing the RNDIS driver for the USB device.
I have uploaded the specific driver on my GitHub page, and you can find it here:
https://github.com/albert-fit/windows_10_raspi_usb_otg_fix
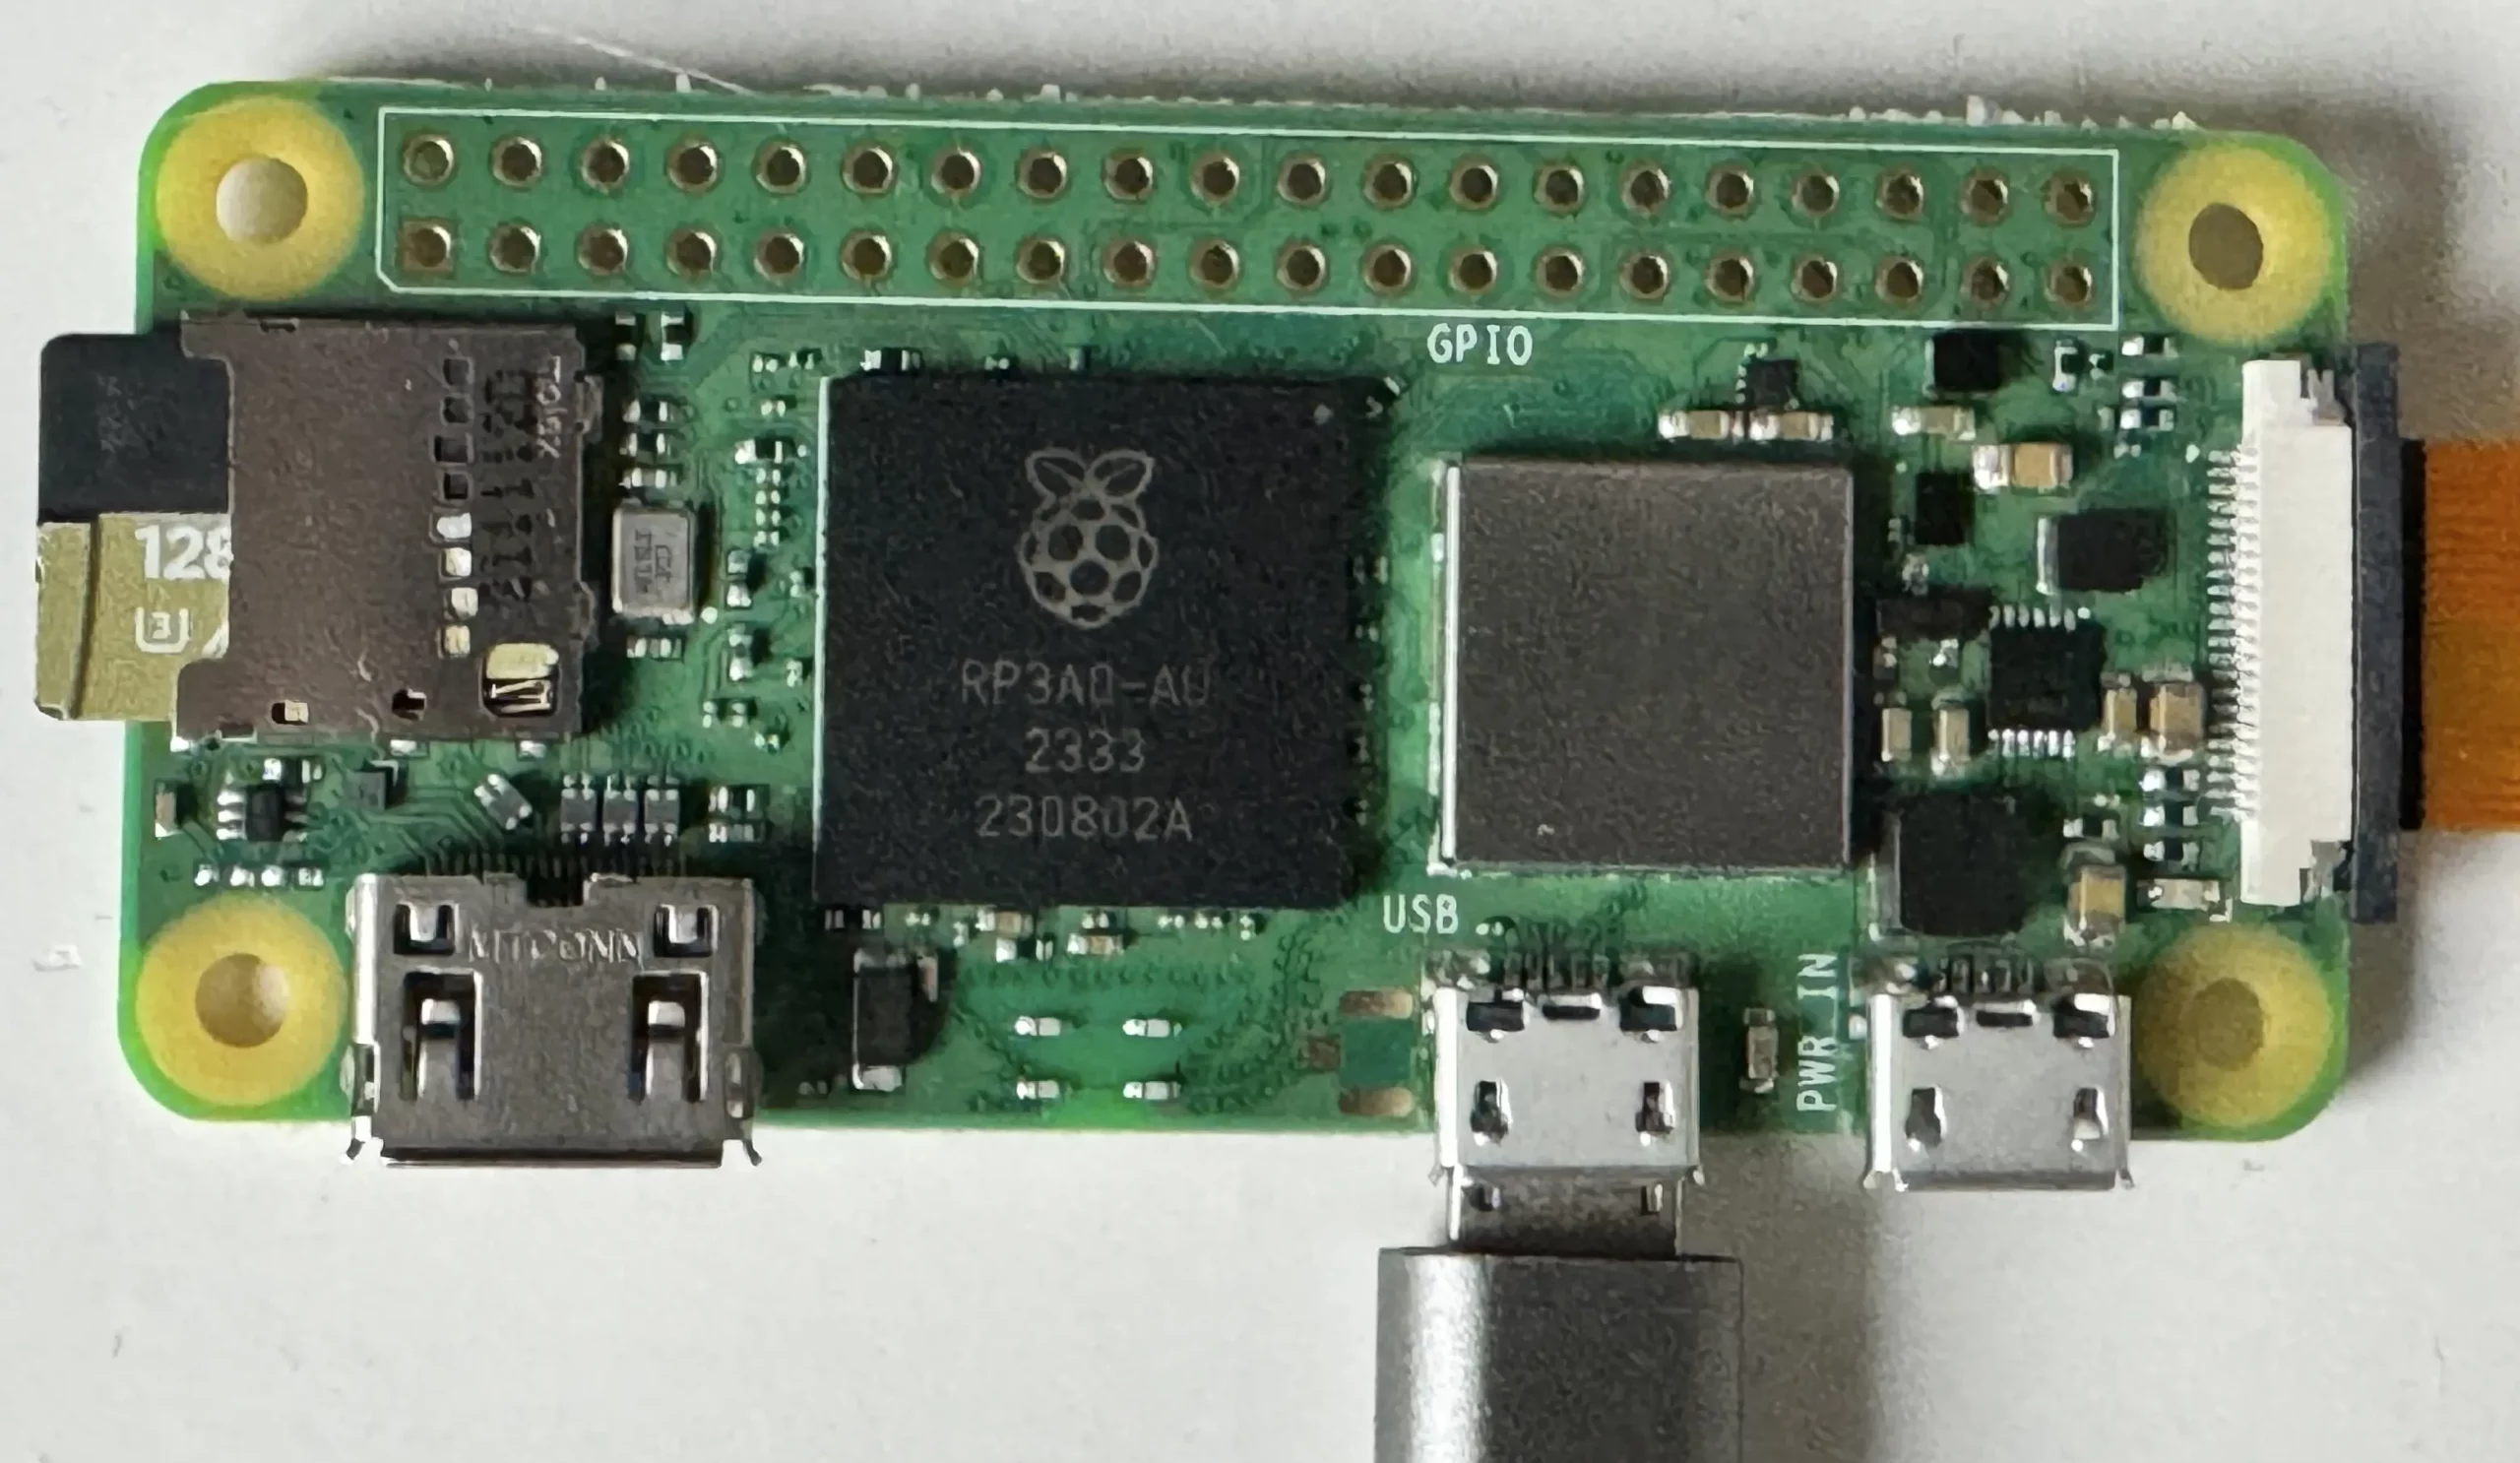
Connect the Raspberry Pi with USB OTG
As in the image above, you can connect the Raspberry Pi by plugging the USB into the connector closest to the HDMI port.
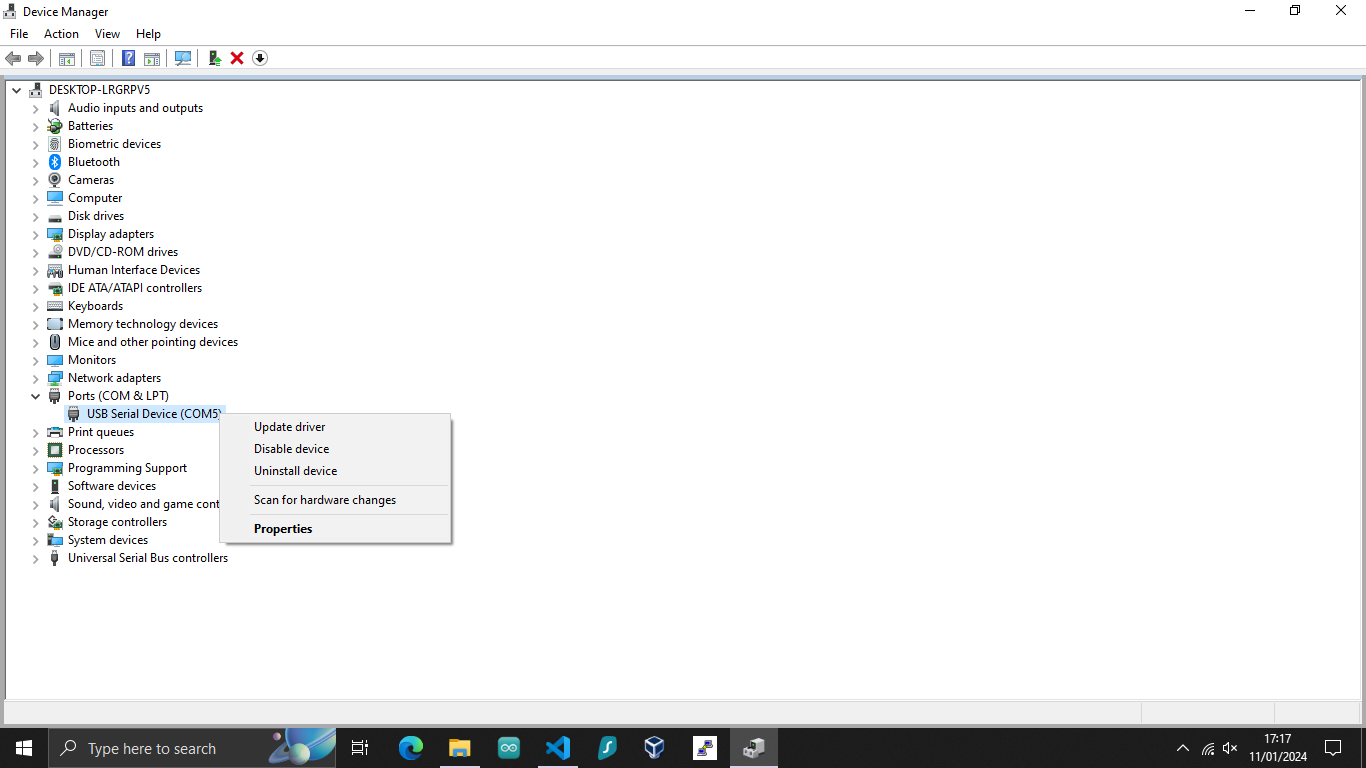
Open up Device Manager and Find the USB Serial Device
Once connected, the Raspberry Pi green light will be on, and you should see the device in your device manager's Ports (COM & LPT) section.
To open the device manager, press the windows symbol on your keyboard and type Device Manager. Click on the first result.
Note: If you do not see the Raspberry Pi in the Ports section, try checking the following:
- There is a valid installation on the SD card, and it is inserted properly.
- You have added modules-load=dwc2,g_ether after rootwait in cmdline.txt (found in bootfs or boot on the SD card)
- Added dtoverlay=dwc2 at the end of the config.txt file (found in bootfs or boot on the SD card)
- And finally, make sure your cable is of good quality and transfers data (some only charge).
Updating the horndis Driver for USB OTG
To update the driver, right-click on the USB Serial Device and click on Update Driver.
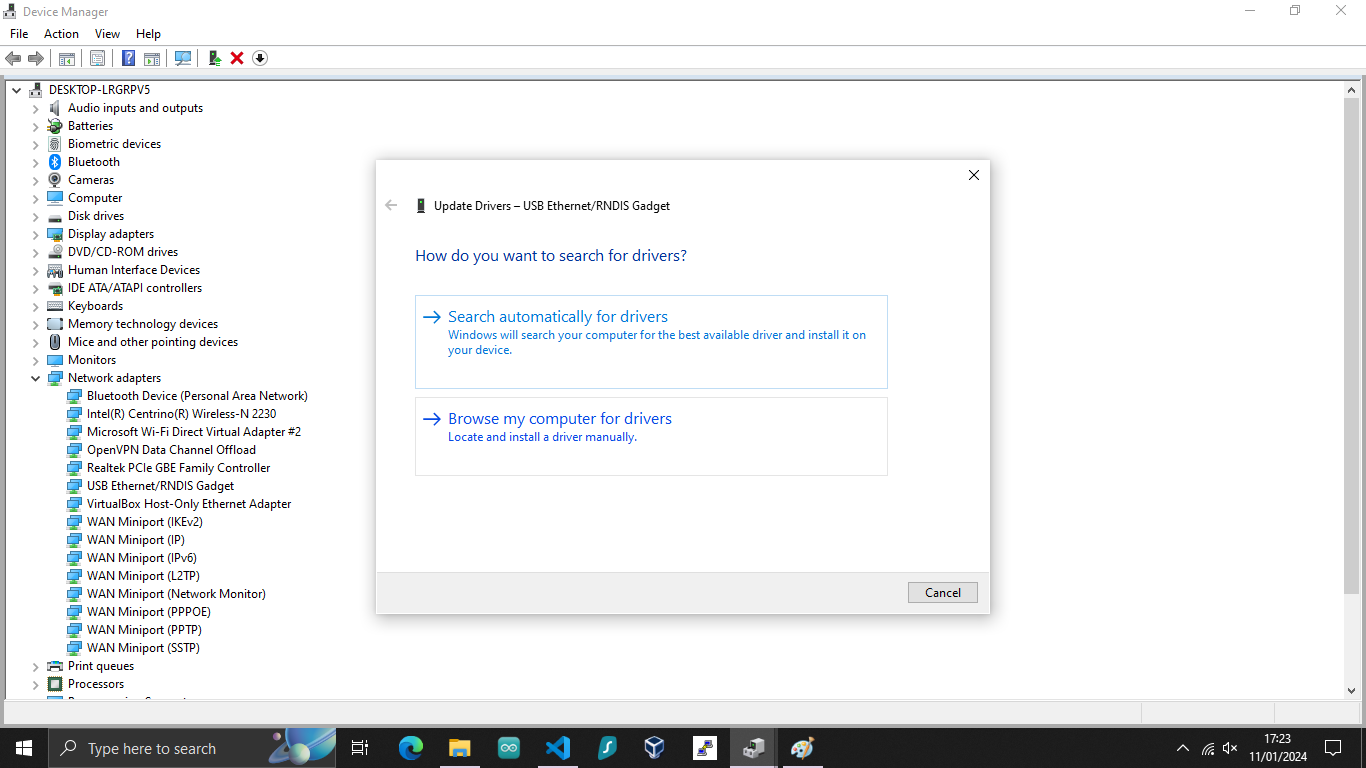
You can just select the folder you have unzipped when downloading the driver.
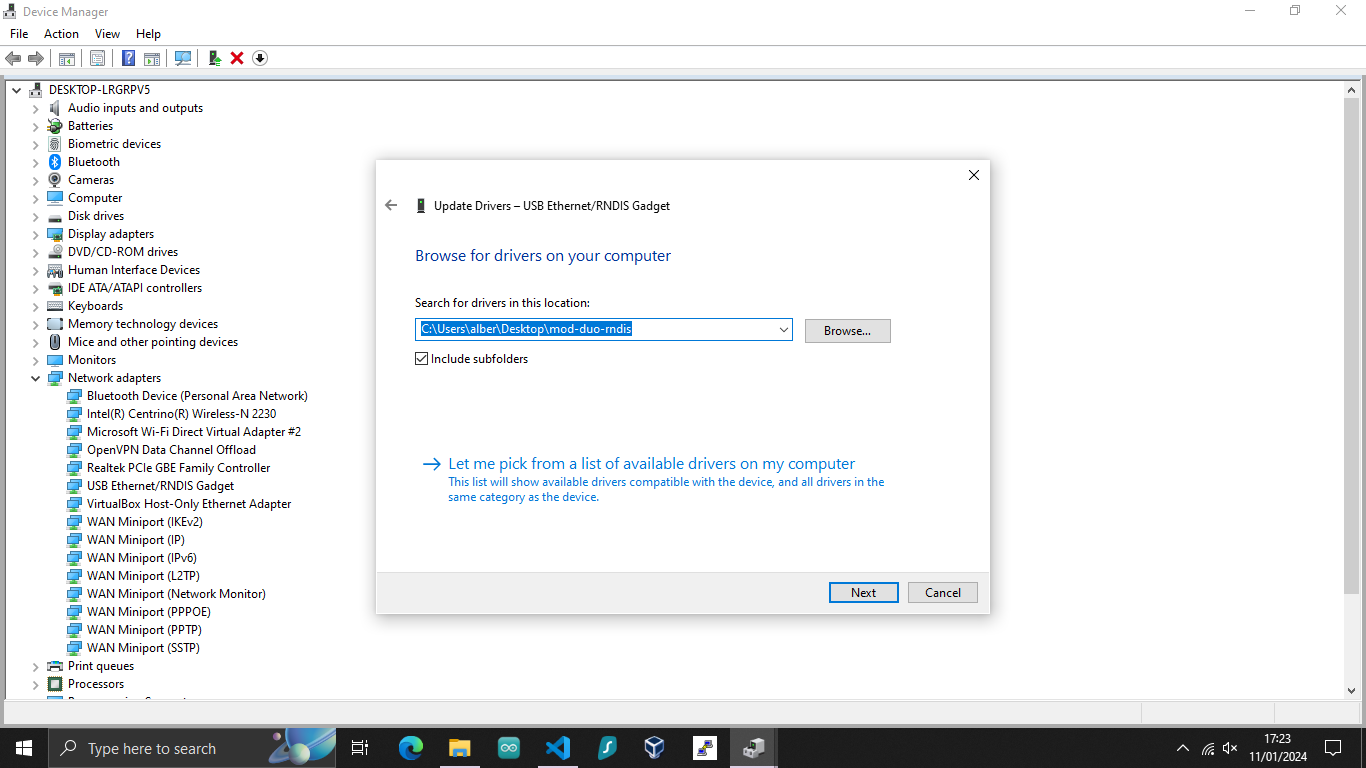
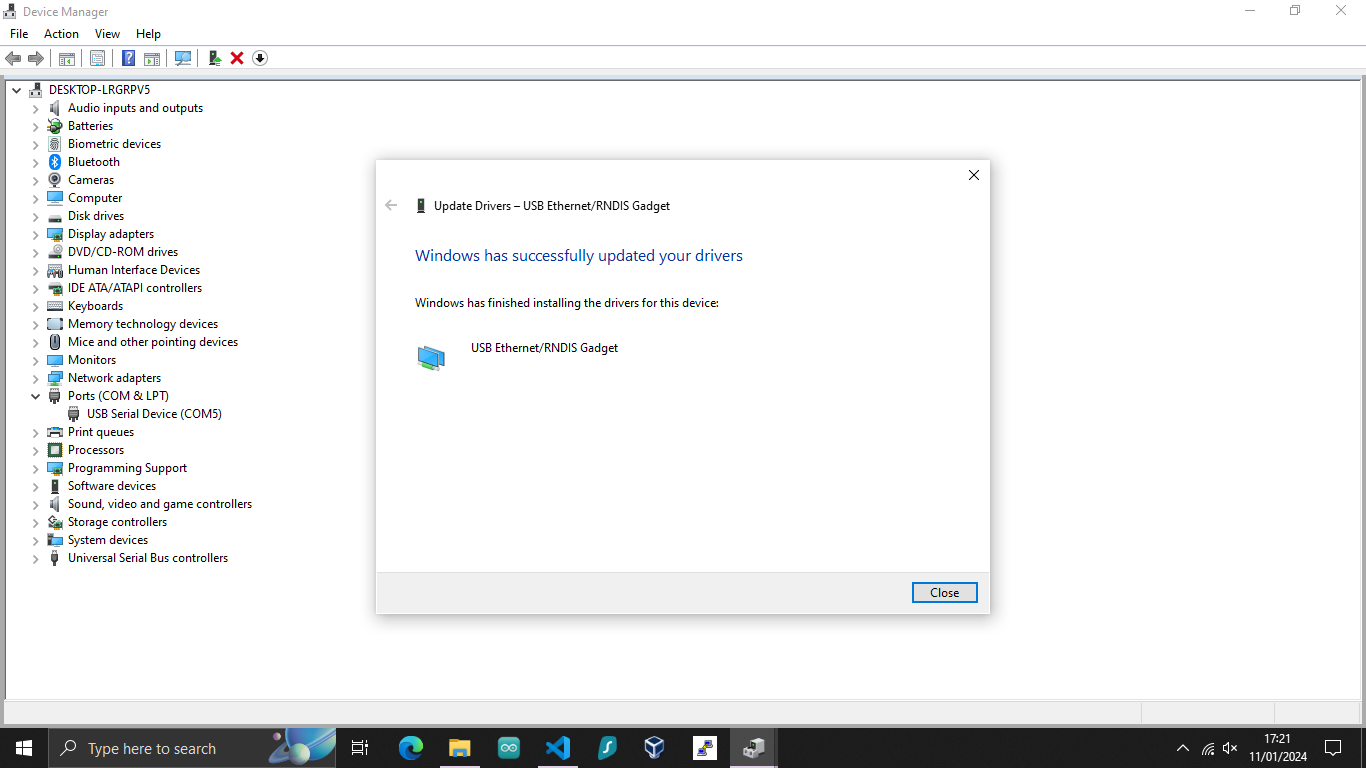
Once the update is complete, the device will show as a USB Ethernet/RNDIS Gadget.
Testing the USB OTG connection
You can check it works as it should by navigating to Network & Internet Settings and clicking on the new Ethernet connection.
You should see the USB Ethernet/RNDIS Gadget in the description.

Conclusion
Congratulations! You can now go ahead and try to SSH or VNC with your favourite clients.
If you would like to purchase a Raspberry Pi Zero 2 W, here are some affiliate links:
Raspberry Pi Zero 2 W on amazon.co.uk
Credits:
This post was largely inspired by MatsK.