How To Connect Libcamera Video To MotionEye On RaspberryPi
Introduction
Have you bought a Raspberry Pi and a ribbon camera like the Arducam, hoping to set it up with MotionEye as discreet CCTV with motion detection? Have you found that your camera needs to be recognised under the MMAL section (or any)? Let's explore what is happening and present a potential fix.
Background Information
MotionEye and MotionEyeOS are open-source interfaces for CCT and intruder detection. They work on Linux environments like Raspbian and allow for multiple camera connections. Each feed has a basic intrusion detection image recognition algorithm that can trigger alerts and notify you via mobile and email.
You can find more about the project here:
https://github.com/motioneye-project
MotionEye uses the vcgencmd get_camera to detect the Raspberry Pi camera module, because it is set up with Raspberry Pi's legacy camera stack. Conversely, cameras like the Arducam IMX 519 and many others use the new camera driver stack based on libcamera and V4L2.
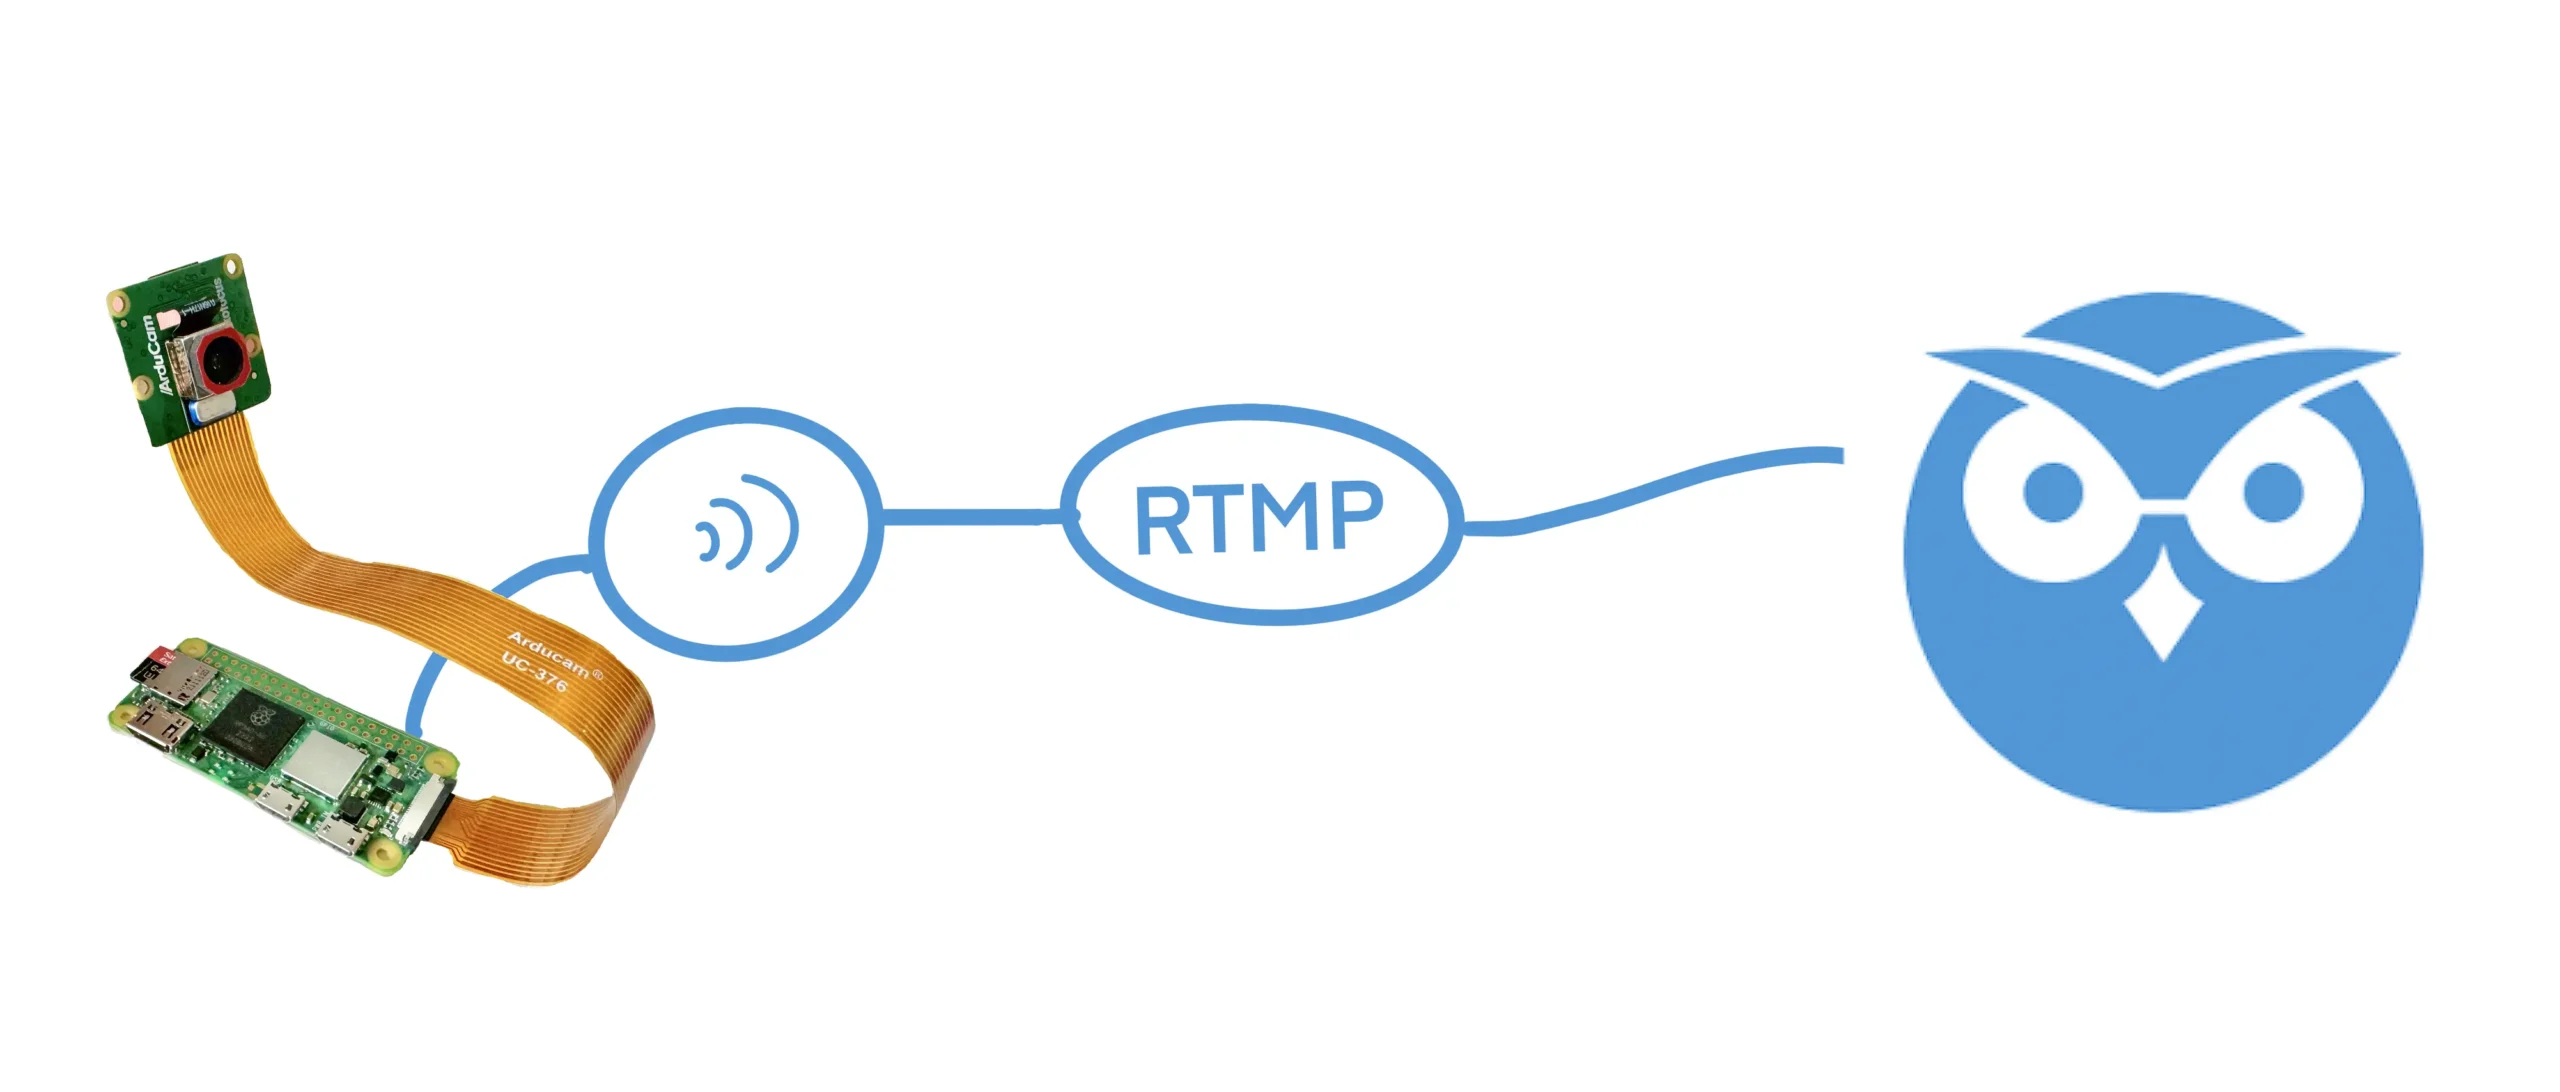
This post will guide you through how to install the drivers for your new camera, how to test it all works and how to set up an RTMP server to stream your camera feed into MotionEye.
For the rest of this post, I will use a Raspberry Pi Zero 2 W and an Arducam IMX 519 to illustrate the process. It should thus work similarly for any other libcamera camera.
Hardware Setup
You can go ahead and flash the Raspberry Pi SD card with Raspberry Pi OS Bullseye or higher. Make sure you have access through SSH and you preferably VNC ( for testing the camera ).
If you would like to purchase a Raspberry Pi Zero 2 W or the Arducam IMX519, here are some affiliate links:
Raspberry Pi Zero 2 W on amazon.co.uk
If are not sure how to do that, I have created a guide that you can use to get started:
Camera and Driver Setup
You will need to install the appropriate drivers for your camera. Arducam and other manufacturers will provide some quick start guide.
Moreover, Arducam's Quick Start Guide for the IMX519 can be found here:
https://docs.arducam.com/Raspberry-Pi-Camera/Native-camera/Quick-Start-Guide/
Sections 1 to 6 of my guide on setting up an RTSP stream with the Raspberry Pi Zero 2 W and Arducam IMX 519 also apply here:
https://albert-fit.com/how-to-stream-with-raspberry-pi-zero-2-w-and-arducam-imx-519/
The following section covers a condensed version.
Arducam IMX519 Driver
Please enable the device tree overlay for the IMX519 sensor ( replace it with your sensor if you use a different camera ).
Modify /boot/config.txt
sudo nano /boot/config.txt
add dtoverlay=imx519 under the line [all]

#Save and reboot
Download the Bash script
Use wget to download the bash script to install the necessary packages.
wget -O install_pivariety_pkgs.sh https://github.com/ArduCAM/Arducam-Pivariety-V4L2-Driver/releases/download/install_script/install_pivariety_pkgs.sh
Change the script permissions
Add execute permissions to the script.
chmod +x install_pivariety_pkgs.shInstall the kernel driver
Install the kernel driver by calling the script with the -p argument followed by the kernel driver for your camera.
./install_pivariety_pkgs.sh -p imx519_kernel_driver_low_speedlibcamera-dev and libcamera-apps Installation
libcamera provides the underlying support for the camera hardware. It deals with capturing stills or video and the required camera settings. The libcamera library also provides the input for our stream.
./install_pivariety_pkgs.sh -p libcamera
./install_pivariety_pkgs.sh -p libcamera_appsTesting the Camera
libcamera-hello allows you to test that the camera driver and output work as they should.
libcamera-helloIf you are running libcamera-hello in the terminal, you should see a message similar to the one below. You should also see a camera preview if you have a monitor or VNC window.
pizero@pizero:~ $ libcamera-hello
Preview window unavailable
[0:01:11.971410388] [1085]  INFO Camera camera_manager.cpp:297 libcamera v0.0.0+4367-ad9428b4
[0:01:12.114477732] [1087]  INFO RPI vc4.cpp:444 Registered camera /base/soc/i2c0mux/i2c@1/imx519@1a to Unicam device /dev/media2 and ISP device /dev/media0
[0:01:12.114666065] [1087]  INFO RPI pipeline_base.cpp:1101 Using configuration file '/usr/share/libcamera/pipeline/rpi/vc4/rpi_apps.yaml'
[0:01:12.116348044] [1085]  INFO Camera camera.cpp:1033 configuring streams: (0) 2328x1748-YUV420
[0:01:12.117231638] [1087]  INFO RPI vc4.cpp:572 Sensor: /base/soc/i2c0mux/i2c@1/imx519@1a - Selected sensor format: 2328x1748-SRGGB10_1X10 - Selected unicam format: 2328x1748-pRAA
#0 (0.00 fps) exp 17750.00 ag 2.00 dg 1.09
#1 (30.00 fps) exp 17750.00 ag 2.00 dg 1.12
#2 (29.99 fps) exp 17750.00 ag 2.00 dg 1.12
...
MotionEye Installation and Configuration
At the time of writing, the most current installation instruction set can be found here:
https://github.com/motioneye-project/motioneye/wiki/Install-on-Raspbian-Bullseye
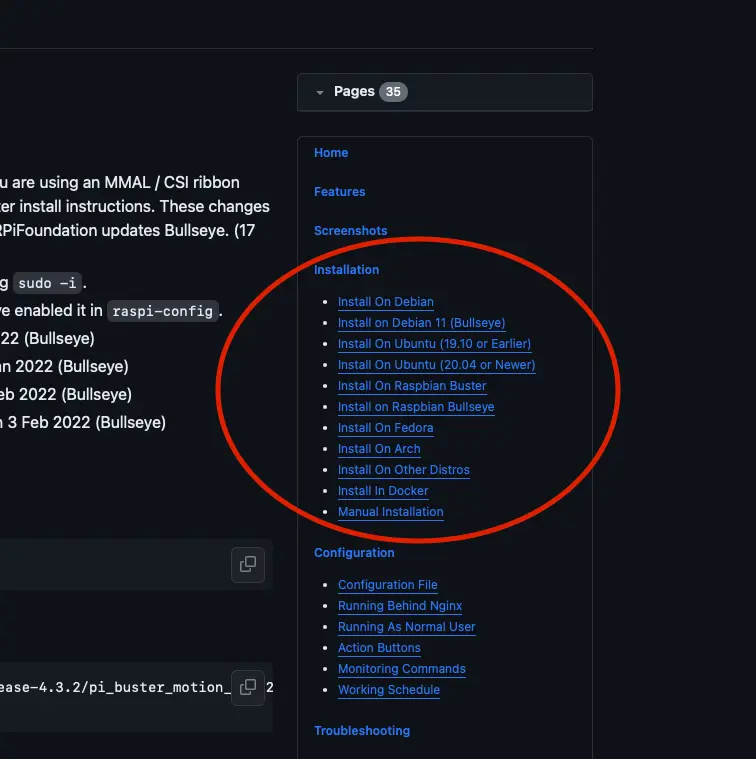
You would be best served to check the latest installation from the installation section on Github:
Install ffmpeg and other motion dependencies:
Let's instruct the Advanced Package Tool (apt) to locate the motion packages in its repositories, download and install them, and any dependencies they might have.
apt-get install ffmpeg libmariadb3 libpq5 libmicrohttpd12 -yHere, you are instructing the system to install the following dependencies:
ffmpeg
A popular multimedia framework capable of decoding, encoding, transcoding, muxing, demuxing, streaming, filtering, and playing almost any type of media (audio and video).
libmariadb3
A client library for MariaDB, a popular database management system, is a MySQL fork. This library allows applications to interact with a MariaDB database.
libpq5
A library used to enable client applications to communicate with a PostgreSQL database server.
libmicrohttpd12
A small C library that makes it easy to run an HTTP server as part of another application.
As an aside, the -y option automatically answers 'yes' to prompts. By including this, you are telling the system to proceed with the installation without asking for confirmation.
Install motion
Download the motion package with wget and use dpkg to install it (option -i).
 wget https://github.com/Motion-Project/motion/releases/download/release-4.3.2/pi_buster_motion_4.3.2-1_armhf.deb
 dpkg -i pi_buster_motion_4.3.2-1_armhf.deb
Disable the motion service and motionEye control for now:
 systemctl stop motion
 systemctl disable motion
Install the dependencies
MotionEye still uses Python 2 (an older version of Python). Install python2 and python-dev-is-python2. The latter is a transitional package that ensures tools expecting python-dev will work as expected with Python 2.
apt-get install python2 python-dev-is-python2 -yInstall the pip package with pip, the package manager for Python, and save it as get-pip.py.
curl https://bootstrap.pypa.io/pip/2.7/get-pip.py --output get-pip.pyDownload and install the latest version of pip.
python2 get-pip.pyInstall the development libraries
apt-get install libssl-dev libcurl4-openssl-dev libjpeg-dev zlib1g-dev -yThese libraries deal with network communication, data encryption, image processing and data compression.
bssl-dev
This library is part of OpenSSL, an open-source project that provides a robust, commercial-grade, full-featured toolkit for implementing the Secure Sockets Layer (SSL) and Transport Layer Security (TLS) protocols. The libssl-dev package contains the development files necessary for building applications that use OpenSSL for SSL/TLS support. It includes headers and other necessary files for compiling applications that require encryption and secure communication capabilities.
libcurl4-openssl-dev
This package is a development version of the libcurl library, which is used for transferring data with URLs. libcurl supports many protocols like HTTP, HTTPS, FTP, and more. The libcurl4-openssl-dev package includes explicitly development files for libcurl compiled with OpenSSL for SSL/TLS support. This means it's suitable for applications that securely transfer data over networks using these protocols.
libjpeg-dev
The libjpeg-dev package includes development files for the JPEG library, widely used for handling JPEG image data. The JPEG library is mainly known for compressing and compressing JPEG image files. This package is essential for developers working on applications that need to manipulate JPEG images, including operations like reading, writing, or transforming JPEG files.
zlib1g-dev
This package contains the development files for zlib, a widely-used library for data compression. zlib provides functions for compressing and decompressing data using the DEFLATE compression algorithm, which balances speed and compression efficiency. It's commonly utilised in applications requiring data compression and decompression functionalities, such as file archiving tools, network protocols, etc.
Install motioneye which will automaticall pull Python dependencies (tornado, jinja2, pillow and pycurl)
pip install motioneyenote: If pillow installation fails (hangs and ends at 99%), you can install it from official repos using :
apt-get install python-pil -y
and rerun
pip2 install motioneye.
From web development and template rendering with Tornado and Jina2 to image processing with Pillow and network operations with PyCURL:
tornado
Tornado is a Python web framework and asynchronous networking library. It is particularly well-suited for long polling, WebSockets, and other applications that require a long-lived connection to each user. Tornado is known for its high performance and is often used in applications that need to handle a large number of simultaneous connections. Unlike traditional web frameworks that are typically synchronous and handle one request at a time, Tornado can handle many thousands of connections simultaneously, making it ideal for real-time web services.
jinja2
Jinja2 is a modern and designer-friendly templating language for Python, modelled after Django’s templates. It is fast, widely used and secure with the optional sandboxed template execution environment. Jinja2 creates HTML, XML, or other markup formats that are returned to the user via an HTTP response. It allows Python data structures to be transformed into a text-based format, making it a popular choice for web development, particularly in generating dynamic HTML content.
pillow
The pillow is the friendly PIL (Python Imaging Library) fork. PIL was originally a library for opening, manipulating, and saving many different image file formats. However, PIL is no longer maintained. Pillow was developed as a more user-friendly and maintained version of PIL. It is used for image processing, creation, and manipulation tasks, offering extensive file format support, an efficient internal representation, and fairly powerful image processing capabilities.
pycurl
A Python interface to the libcurl library, a free and easy-to-use client-side URL transfer library. PyCURL allows Python applications to use libcurl's capabilities, such as performing and managing HTTP and HTTPS requests, uploading files via FTP, sending emails using SMTP, and more. PyCURL is known for its performance and ease of use for network programming. It is a popular choice for applications that need to interact with different types of web services or perform network operations.
Prepare the configuration directory:
Make a directory in the /etc/motioneye folder and copy the motioneye.conf.sample as motioneye.conf.
 mkdir -p /etc/motioneye
 cp /usr/local/share/motioneye/extra/motioneye.conf.sample /etc/motioneye/motioneye.conf
Prepare the media directory
create a directory for the media:
mkdir -p /var/lib/motioneyeCreate an init script for the motionEye server and configure it to run at startup
 cp /usr/local/share/motioneye/extra/motioneye.systemd-unit-local /etc/systemd/system/motioneye.service
 systemctl daemon-reload
 systemctl enable motioneye
 systemctl start motioneye
These commands are used to reload the systemd configuration, set the motioneye service to start automatically at boot, and start the motioneye service immediately:
daemon-reload
Reload the systemd manager configuration. This reloads all unit files and recreates the entire dependency tree. It's often necessary to run this command after making changes to a service file (for example, a file in /etc/systemd/system/) to ensure systemd is aware of the changes. The command does not restart any services or units but reloads the configuration files.
enable motioneye
Enable a service named motioneye. Enabling a service means that it will be started automatically at boot time. This is different from starting a service, which runs it once. By enabling motioneye, you're ensuring that the service will start every time the system boots up. The motioneye service is likely related to the MotionEye software, a web frontend for the motion daemon monitoring and controlling camera feeds.
start motioneye
Starts the motioneye service immediately. Unlike the enable command, start doesn't configure the service to start at boot but simply starts it right now. This is useful for initiating services that don't need to run constantly or for testing purposes after configuring or troubleshooting a service.
To upgrade to the newest version of motionEye:
 pip install motioneye --upgrade
 systemctl restart motioneye
Testing MotionEye
You can test motion eye by entering the following URL string into your browser:
http://[hostname or ip]:8765
In my case this look something like this:
http://pizero.local:8765
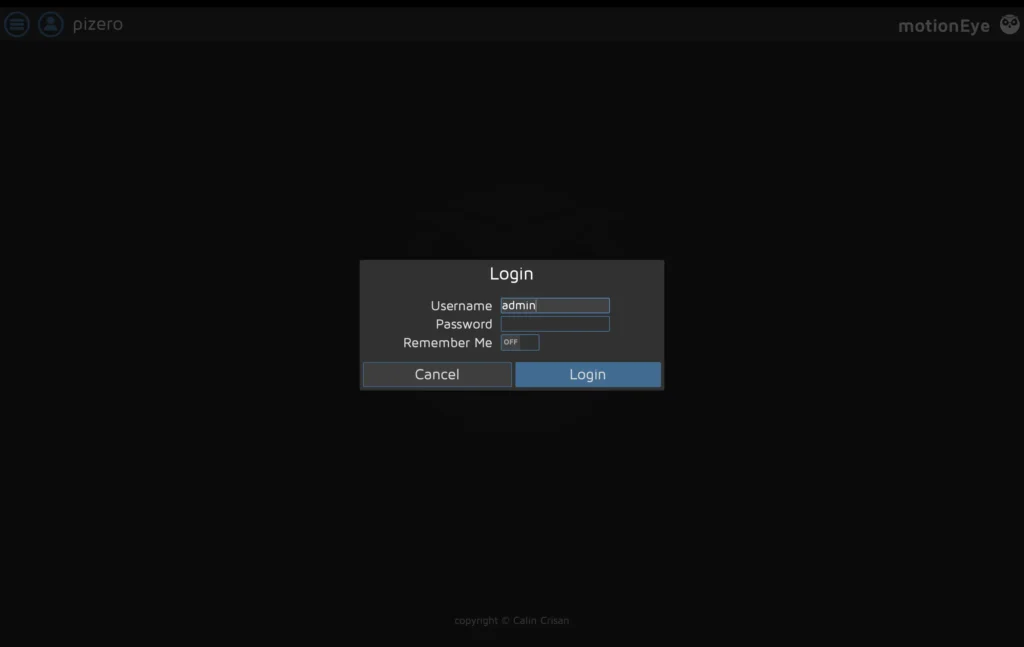
The default username is admin, and there is no password. It is recommended you change the username and password as soon as possible.
RTMP Stream Setup
Create a new bash script called stream.sh.
sudo nano stream.shPaste the following script:
#!/bin/bash
libcamera-vid -t 0 --width 1920 --height 1080 --nopreview --exposure long \
 --sharpness 1.2 --contrast 1.4 --brightness 0.2 --saturation 1.0 --awb auto --denoise auto \
--rotation 0 --codec libav --libav-format flv -n --framerate 30 -b 3200000 --autofocus-mode auto \
 --inline -o "rtmp://127.0.0.1/pi/test"
This libcamera-vid command is used to capture the video with your Raspberry Pi. We then take and output the video to the RTMP (Real-Time Messaging Protocol) server.
-t 0
Runs the camera indefinitely (0 milliseconds).
--width 1920 --height 1080
Sets the video resolution to 1920x1080 pixels.
--nopreview
Disables the preview window.
--exposure long
Sets a longer exposure time.
--sharpness 1.2 --contrast 1.4 --brightness 0.2 --saturation 1.0
Adjusts image sharpness, contrast, brightness, and saturation.
--awb auto
Sets the automatic white balance mode.
--denoise auto
Enables automatic noise reduction.
--rotation 0
Sets the image rotation to 0 degrees.
--codec libav
Specifies the libav codec for encoding the video.
--libav-format flv
Sets the format of the video to FLV (Flash Video).
-n
Disables the display of preview window information.
--framerate 30
Captures video at 30 frames per second.
-b 3200000
Sets the bitrate to 3,200,000 bits per second.
--autofocus-mode auto
Enables automatic focusing.
--inline
Includes inline headers in the video stream (useful for streaming).
-o "rtmp://127.0.0.1/pi/test"
Outputs the video to the specified RTMP (Real-Time Messaging Protocol) server URL.
Enabling the Streaming Script as a Service
Setting the permissions for the streaming script
Now you have to enable the script file to be executed:
Note: Replace pizero with your pi username.
sudo chmod +x /home/pizero/stream.shEnabling stream.service
sudo nano /lib/systemd/system/stream.servicePaste the following in it (keeping in mind that pizero is the user in /home/pizero/stream.sh and you will need to replace with your own user):
[Unit]
Description=Custom Webcam Streaming Service
After=multi-user.target

[Service]
Type=simple
ExecStart=/home/pizero/stream.sh
Restart=on-abort

[Install]
WantedBy=multi-user.target
Set the correct permissions on the service file:
sudo chmod 644 /lib/systemd/system/stream.serviceThis permission setting (644) is commonly used for configuration files and scripts that should not be executed but must be readable and editable by the owner.
644: This is the numeric mode, which represents the new permissions for the file. In Unix-like systems, file permissions are represented by three sets of digits. The first digit represents the user's permissions, the second digit represents the group's permissions, and the third digit represents others' permissions.
- The digit
6(which stands forrw-in symbolic notation) grants the user (owner) read and write permissions but not execute permission. - The digit
4(which stands forr--) grants read-only permission. This is applied to both the group and others.
Create the service on the system
sudo systemctl enable stream.serviceBy running sudo systemctl enable stream.service, you are instructing systemd to create the necessary links and configurations to start the stream.service automatically whenever the system boots up. This is particularly useful for background services or daemons running whenever the system is operational, such as making sure your rtsp server spins up as soon as the Raspberry Pi Zero 2 W boots up.
Start the service.
sudo service stream startRunning sudo service stream start, you are instructing the system to start the stream service. This is typically used to activate daemons or background services that need to run continuously or are required for the functioning of other parts of the system.
It's important to note that in systems that use systemd (which has become the default in many modern Linux distributions), the systemctl command is generally used instead of service. However, the service command is still present for compatibility reasons and is often a wrapper around systemctl in such systems.
Check the status of the service
sudo service stream statusInstall NGINX
Install NGINX on your Raspberry Pi, the basic set of modules required to run it as a web server, and the RTMP module for handling media streaming.
sudo apt install nginx-common nginx-core libnginx-mod-rtmp nginx-common
This package contains standard files for all NGINX packages, such as configuration files and documentation. It depends on other NGINX packages and is usually installed alongside them.
nginx-core
This package provides the core NGINX files. It includes the NGINX binary and essential modules required to run NGINX as a web server and reverse proxy. This is the main NGINX package you'd install to set up an NGINX server.
libnginx-mod-rtmp
This package is a module for NGINX that enables RTMP (Real-Time Messaging Protocol) support. RTMP is a protocol commonly used for streaming audio, video, and other data over the internet, especially in applications like live broadcasting. NGINX can handle RTMP streams by installing this module, making it suitable for media streaming applications.
NGINX RTMP Configuration
You can go ahead and open the nginx.conf with nano.
nano /etc/nginx/nginx.confPaste the following at the end of the file and save it:
rtmp {
        server {
                listen 1935;
                chunk_size 4096;
                allow publish 127.0.0.1;
                deny publish all;

                application pi {
                        live on;
                        record off;
                }
        }
}
This configuration sets up NGINX to handle RTMP streams, allowing live streaming. Here's how it works:
rtmp {
This line begins the configuration block for the RTMP module.
server {
Defines a server block within the RTMP context. This is similar to server blocks in the HTTP context but for RTMP streams.
listen 1935;
This directive tells the RTMP server to listen on port 1935, the default port for RTMP.
chunk_size 4096;
Sets the RTMP chunk size to 4096 bytes. This is the size of the data chunks in which the stream is divided.
allow publish 127.0.0.1;
Allows only the localhost (127.0.0.1) to publish streams to this server.
deny publish all;
Denies all other IPs from publishing streams to this server. Combined with the previous directive, this restricts publishing to the local machine only.
application pi {
Starts a configuration block for an application named "pi". This is a specific context for RTMP streaming.
live on;
Enables live streaming for this application.
Restart NGINX
sudo service nginx restartTesting the RTMP Stream
You can use VLC to test your RTMP Stream by navigating to File -> Open Network (ctrl + N) and entering the following connection string:
rtmp://[YOUR_HOSTNAME]/pi/test
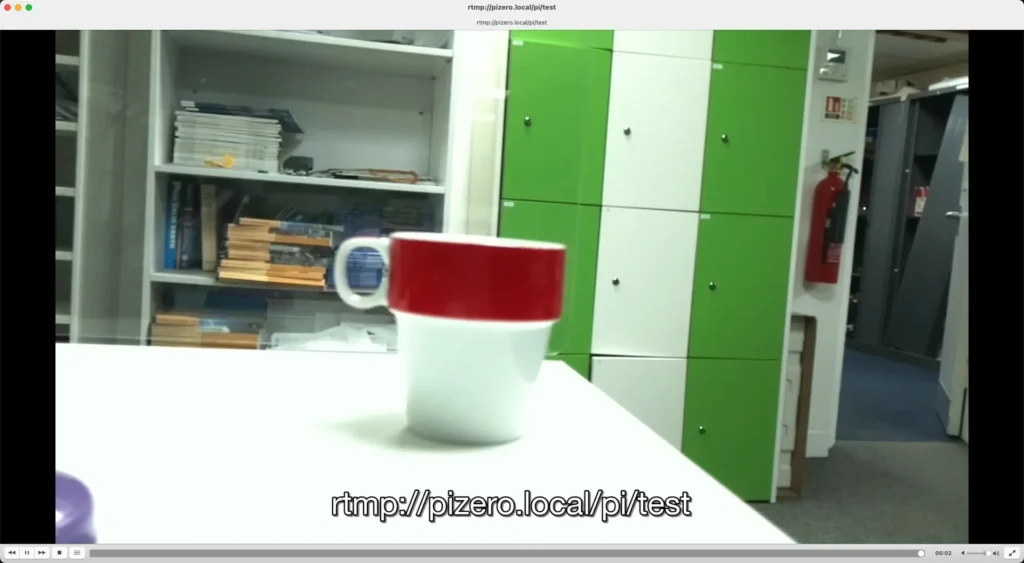
In my case, it is:
rtmp://pizero.local/pi/test
Linking the stream in MotionEye
You can now return to your MotionEye interface (https://[YOUR_HOSTNAME]:8765) and add a new camera.
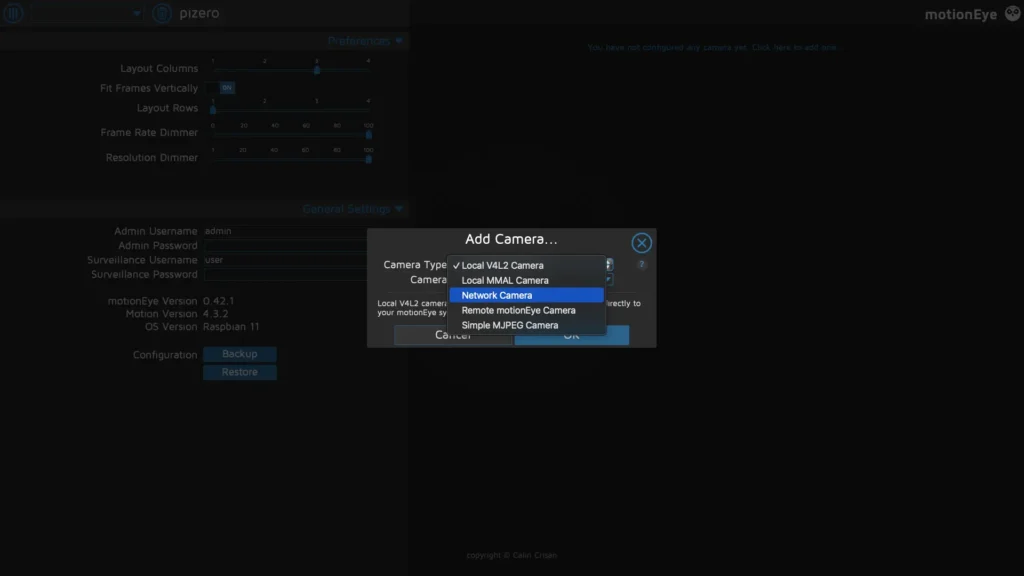
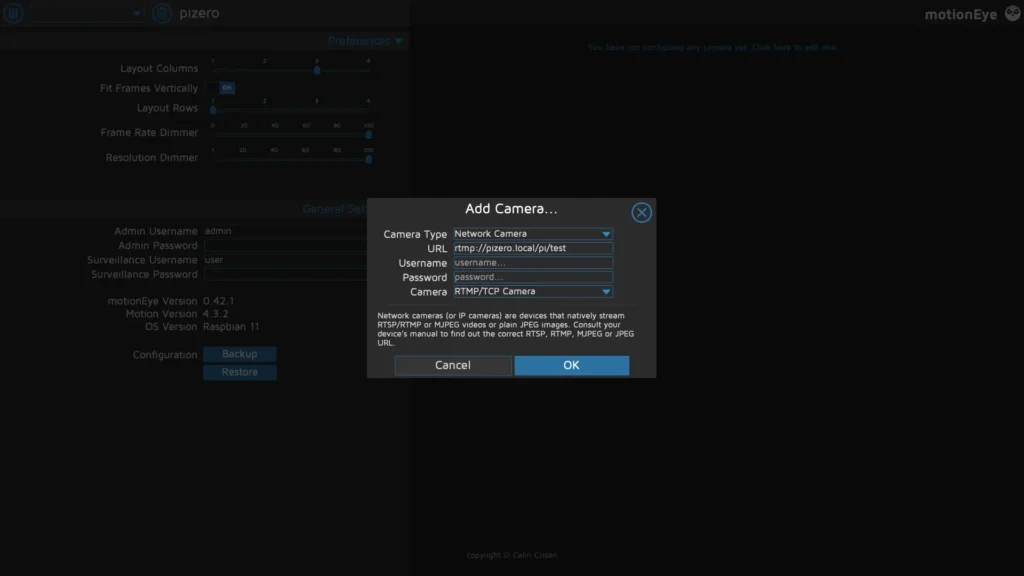
Select Network Camera under Camera Type and add the RTMP URL as you set it up in the stream bash script.
This should work with:
rtmp://[YOUR_HOSTNAME]/pi/test
or
rtmp://127.0.0.1/pi/test
You can, of course, change this configuration later on.
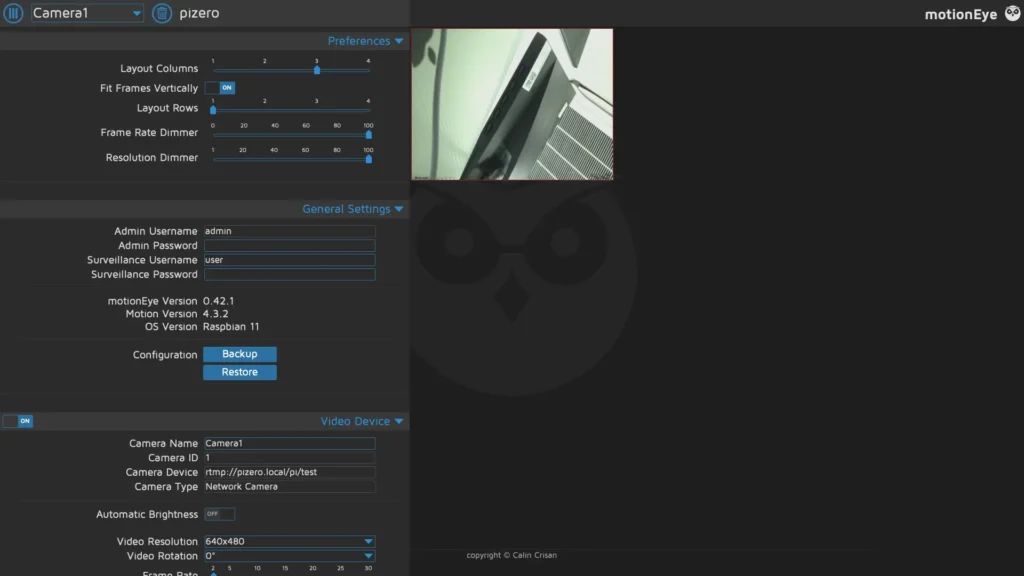
Your camera will take some time to register ( RTMP does have a significant delay).
Performance Optimisation
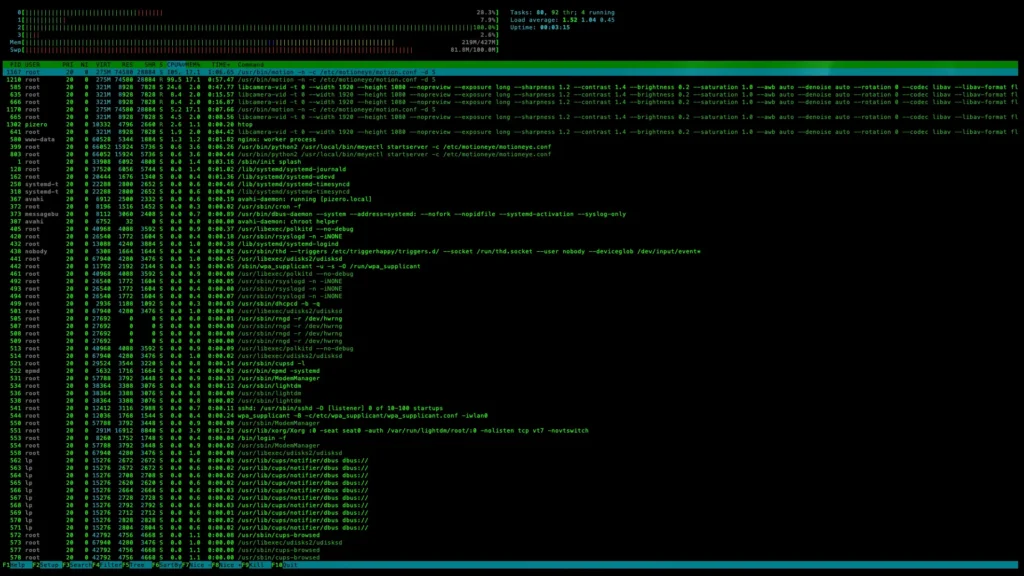
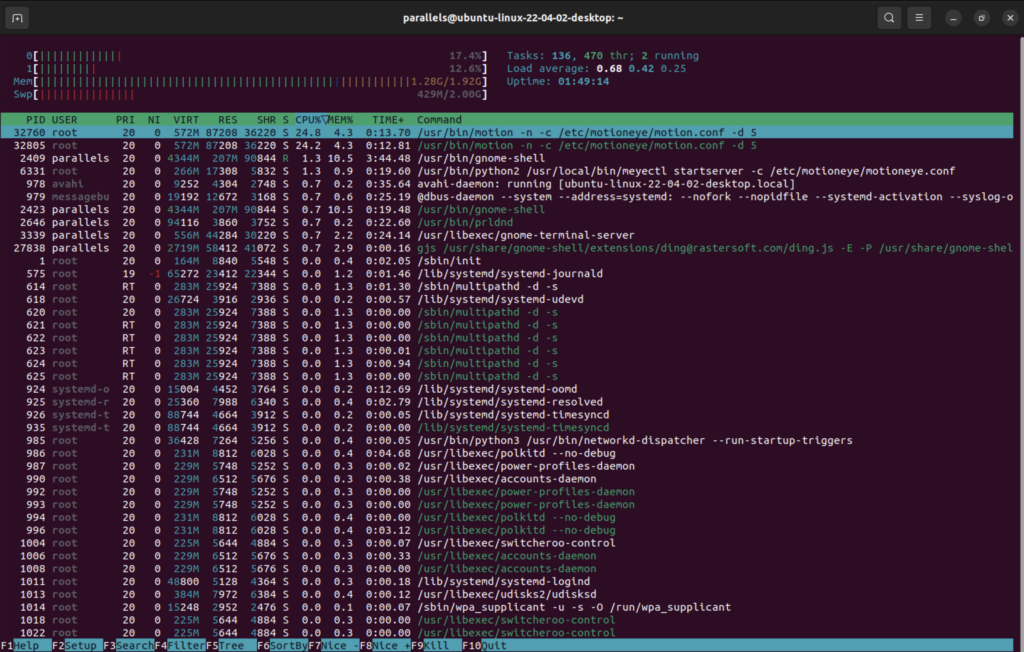
Running MotionEye on a Raspberry PI Zero 2 W with the RTMP server as a feed produces mediocre, if not poor, results.
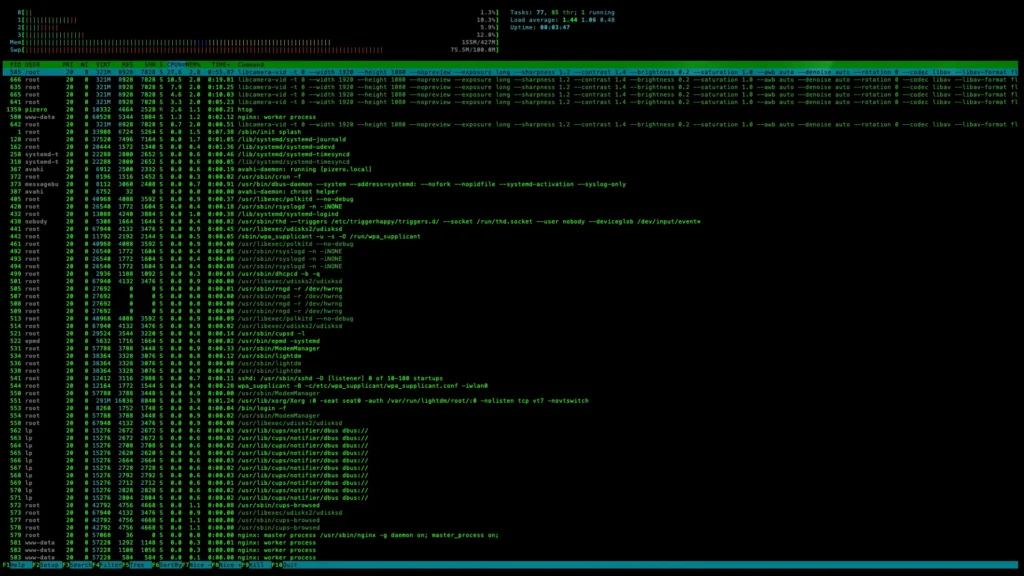
You can run htop in an SSH window to view the CPU load on your Raspberry Pi. In this case, we can see that MotionEye maxes out the CPU, which is also apparent from the drop in frame rate and delay in the footage.
You can also stop the motion eye service by running:
sudo service motioneye stop

htop
#to view resoureces
We can now observe that the resources taken up by the RTMP stream are significantly lower than the stream along with MotionEye.
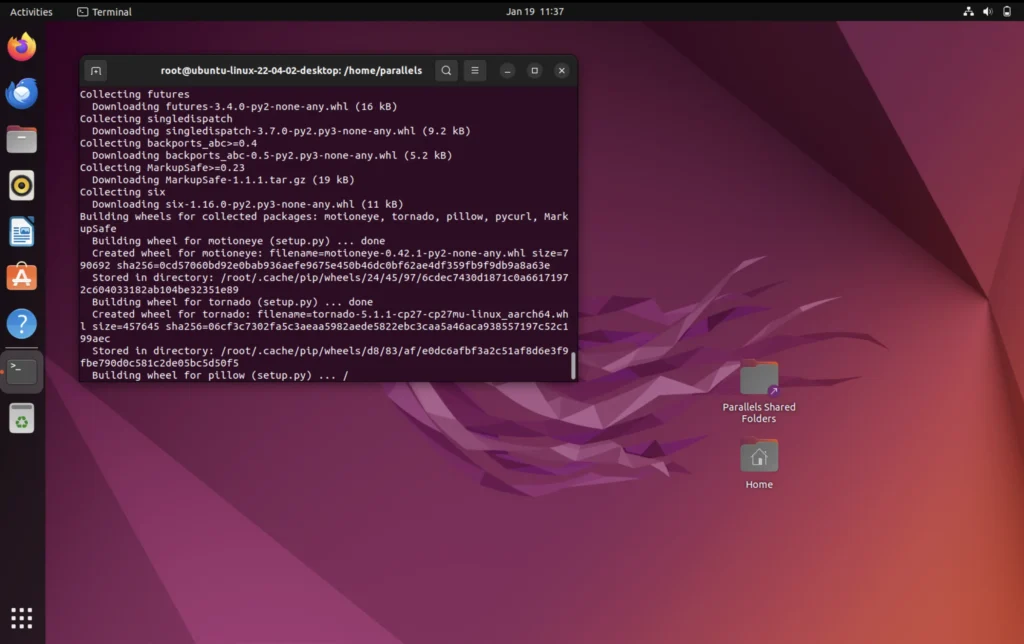
MotionEye on a separate machine
We can also test how MotionEye works with the RTMP feed through a virtual machine's Ubuntu 22.04.2 LTS installation. You can install a different distribution in a virtual machine or 'bare metal' on a Raspberry Pi or your server computer.
I have followed the MotionEye installation guide, which you can find here:
https://github.com/motioneye-project/motioneye/wiki/%28Install-On-Ubuntu-%2820.04-or-Newer%29
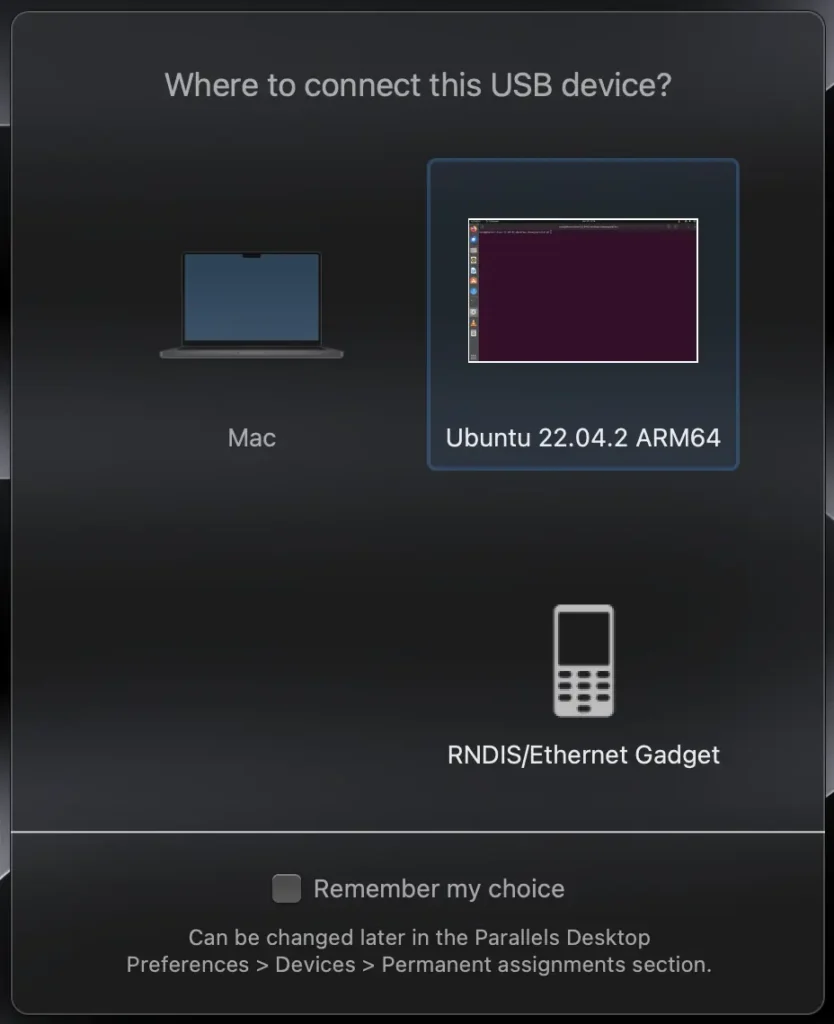
Notes for testing in USB OTG and Virtual Machine
These notes only apply if you plan on testing the connection with USB OTG.
I am using Parallels, and when you connect your Raspberry Pi, you should get a similar message. Forward the RNDIS/Ethernet Gadget to your virtual machine.
If you are using Virtual Box, you can find some instructions here:
https://www.flexihub.com/usb-in-virtual-machine/virtualbox-usb-passthrough/
If you are using USB OTG you need to set:
IPV4 to Link-Local Only
IPV6 to Disable
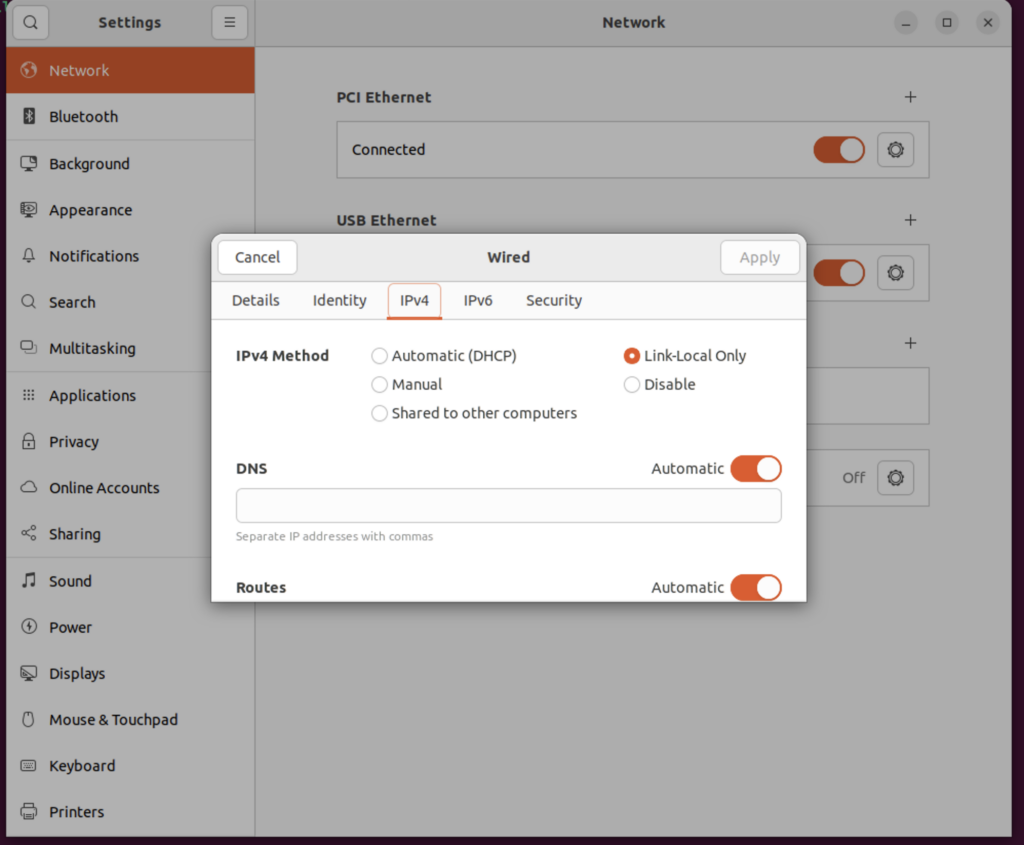
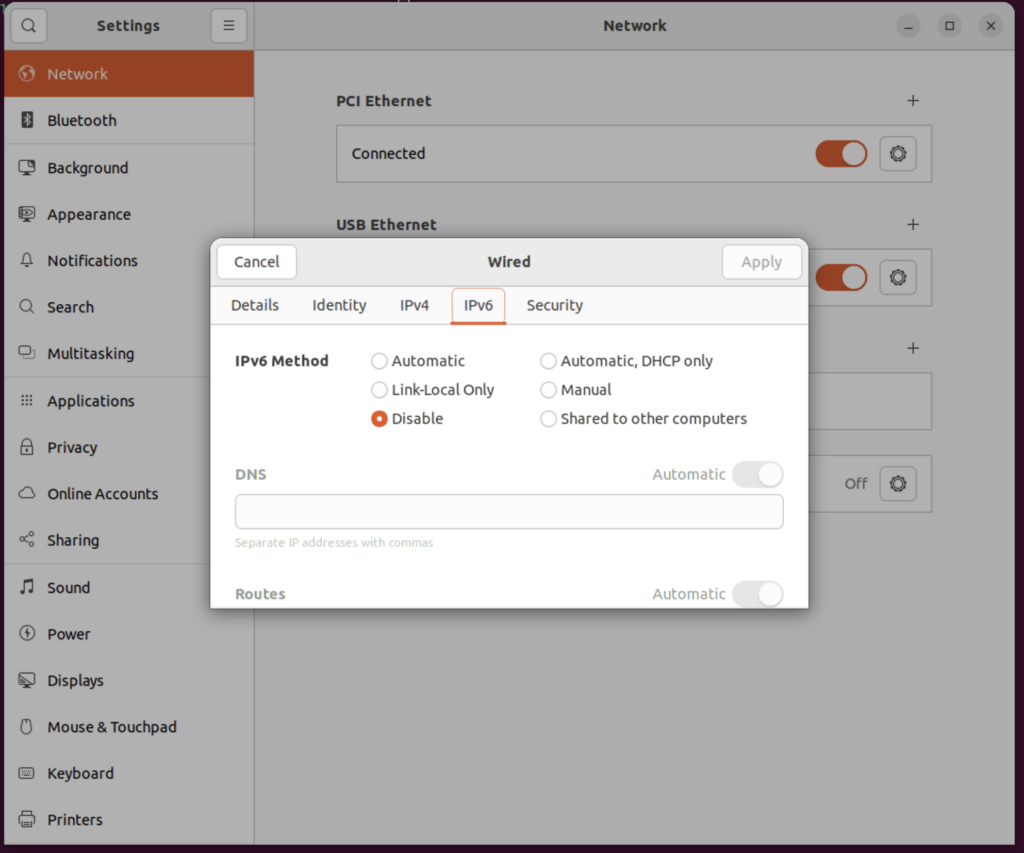
Your USB Ethernet connection should now list as connected. You can test it by pinging your hostname:
ping [YOUR_HOSTNAME].local

#in my case: ping pizero.local
MotionEye on Server Machine
Add the RTMP connection to the MotionEye server in the virtual machine.

You will see an ability to run much higher frame rates with lower latency.
You can also recheck your resourcing by running htop.
Conclusion
In conclusion, setting up a Raspberry Pi with a camera like the Arducam IMX 519 for use with MotionEye as a discreet CCTV system with motion detection can be a rewarding DIY project. This guide has walked you through the steps, from flashing the SD card with the appropriate OS, installing the required drivers for your camera, and configuring both the camera and MotionEye software. The detailed steps included testing the camera, setting up an RTMP server, and configuring NGINX to handle the RTMP streams, ensuring a smooth and efficient setup process.
You now have a functional and customisable CCTV system by overcoming the initial hurdle of camera detection and compatibility issues with MotionEye. Whether you're using it on a Raspberry Pi Zero 2 W or another setup, the flexibility and scalability of this system are evident. Additionally, you can optimise performance and frame rates with lower latency by exploring alternative setups like running MotionEye on a separate machine or using a virtual machine to achieve a higher grade stream.
Remember that DIY projects like this provide a practical solution to your security needs and offer a great opportunity to learn and experiment with technology. Whether you're a seasoned maker or a curious beginner, the journey of setting up your own Raspberry Pi-based CCTV system with MotionEye is both educational and rewarding.